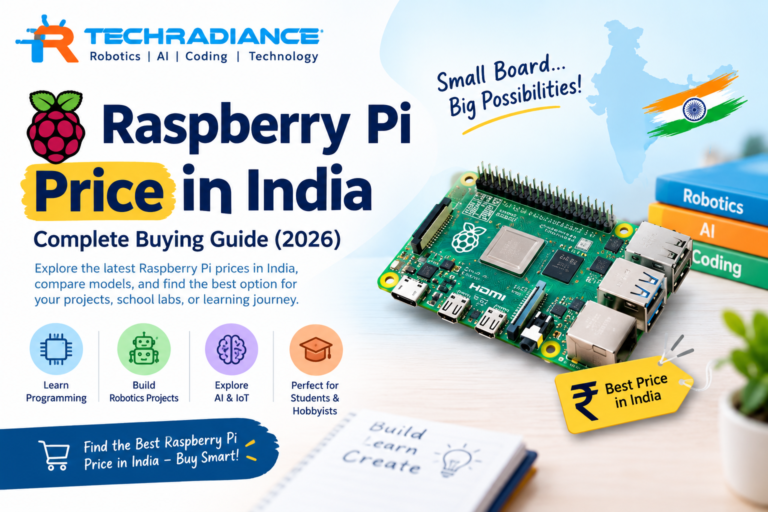
Raspberry Pi Price in India: Complete Buying Guide (2026) 

Raspberry Pi Price in India: Complete Buying Guide (2026) 

When you plan to buy a Raspberry Pi in 2026, one of the first questions you may ask  what is the Raspberry Pi price in India

The model, RAM, vendor, and necessary accessories all affect the price. A Raspberry Pi is a tiny computer that may be used for basic computer operations, robot construction, IoT projects, smart device creation, and learning to code.

In this blog we will discuss about  Raspberry Pi price in India,  various models, factors that influence the price, the best Raspberry Pi for students, how to get a good deal, and things to look out for before making a purchase are all covered in this guide.

This article will help you in selecting regardless of a student or a school.

Author: Himanshu ( Content Writer)

What Is a Raspberry Pi?

A Raspberry Pi is a cheap. It is roughly the size of a credit card, but it has many of the same capabilities as a typical computer.

A monitor, keyboard, mouse, internet, camera, sensors, motors, and many more devices can all be connected to it.

A student can utilize a Raspberry Pi, for example, to:

  • Study Python and other programming languages.
  • Construct a robot
  • Make a project for a smart home.
  • Create an Internet of Things gadget
  • Attach sensors
  • Construct a basic security camera
  • Study up on artificial intelligence.
  • Make science projects for the classroom.

With memory configurations ranging from 16GB, the Raspberry Pi 5 is now the most recent major version of Raspberry Pi computers. Wi-Fi, Bluetooth, USB ports, Gigabit Ethernet, a 40-pin GPIO header, and support for two 4K screens are all included.

What Is the Raspberry Pi Price in India in 2026?

Depending on the model and RAM, the cost of a Raspberry Pi price in India.

Generally speaking, older versions and smaller boards may be less expensive than Raspberry Pi 5 variants, which might cost several thousand rupees. Stock, taxes, imports, seller margins, and discounts can all affect prices.

For example, the Raspberry Pi 5 prices vary greatly among sellers in recent Indian market listings, so it’s crucial to analyze the entire package rather than selecting a product just because its advertised price seems affordable.

Approximate Raspberry Pi Price in India 

Raspberry Pi ModelTypical Indian Price Range*Best For
Raspberry Pi PicoAround ₹400–₹800Basic electronics
Raspberry Pi Zero / Zero 2 WAround ₹1,500–₹5,500+Small projects
Raspberry Pi 4Around ₹5,000–₹20,000+Learning & projects
Raspberry Pi 5 2GBAround ₹5,000–₹7,000+Students & basic projects
Raspberry Pi 5 4GBAround ₹6,000–₹9,000+Coding & robotics
Raspberry Pi 5 8GBAround ₹8,000–₹15,000+Advanced projects
Raspberry Pi 5 16GBAround ₹15,000–₹25,000+Heavy workloads

* Prices are subject to change based on the seller, availability, and accessories. Prior to making a purchase, always verify the current pricing.

Raspberry Pi 5 memory options include 1GB, 2GB, 4GB, 8GB, and 16GB, according to the official product information.

Raspberry Pi Cost in India: Why Does the Price Change? 

There is more to the Raspberry Pi cost in India than just the device itself. When purchasing a Raspberry Pi, you might also require:

  • MicroSD card case with power supply
  • Cooling fan
  • HDMI cord
  • Keyboard, mouse, sensors, camera, motors, and robotic parts

This implies that the total project cost may exceed the cost of the Raspberry Pi hardware.

For example, a sufficient USB-C power supply is needed for the Raspberry Pi 5, and cooling may be crucial for heavy workloads. The Raspberry Pi 5 should run on 5V/5A power, according to the official Raspberry Pi specifications; accessories like storage and cooling must be bought separately.

Thus, before making a purchase, consider:

“Do I need only the Raspberry Pi board, or do I need a complete project kit?” 

You can determine your actual budget by asking this simple question.

Which Raspberry Pi Should Students Buy?

The Raspberry Pi 5 with 4GB RAM is a good place to start for the majority of kids learning robotics, electronics, coding, or the Internet of Things.

Why?

because it provides students with sufficient power for numerous educational tasks without requiring them to purchase the most advanced RAM version right away.

It can be used by students to learn:

  • Python, Scratch, IoT, Robotics, Linux, and Electronics
  • Programming for computers
  • Fundamental ideas in AI

A smaller Raspberry Pi board can possibly be sufficient if the project is very basic.

2GB Raspberry Pi 5

Basic learning, coding, easy desktop chores, and smaller projects can all benefit from the 2GB edition.

4GB Raspberry Pi 5

For robotics projects, educators, creators, and students, the 4GB version is a decent compromise.

8GB Raspberry Pi 5

When you require extra memory for larger tasks and heavier programs, the 8GB version is helpful.

16GB Raspberry Pi 5

For customers who require much more memory for intensive workloads, the 16GB version is intended. For a novice student, it is typically not required.

Raspberry Pi Lowest Price: How Can You Find a Good Deal?

The cheapest listing isn’t usually the greatest value, but everyone wants to find the Raspberry Pi at the best price.

A relatively low cost could indicate:

The item is outdated.

It has less RAM.

There are no accessories included.

The vendor is untrustworthy

The item is not available.

Only the board is included in the mentioned price.

Compare the overall cost rather than just focusing on the lowest figure.

For example:

The whole cost of purchase includes the board, power supply, storage, case, and cooling.

Additionally, be sure the vendor is an authorized Raspberry Pi reseller. Because these vendors are carefully chosen partners who offer local purchasing and assistance, Raspberry Pi advises ordering through its network of Approved Resellers.

How to Buy Raspberry Pi in India?

Raspberry Pi In India

Use these easy methods to buy a Raspberry Pi India.

Step 1: Select Your Project

Think about what you want to make first.

Would you like to construct a robot?

Are you interested in learning Python?

Would you like to create an Internet of Things project?

The Raspberry Pi you require will be determined by your project.

Step 2: Select the RAM

4GB is a sensible option for a lot of novices.

2GB might be sufficient for straightforward projects.

Think about 8GB or 16GB for more demanding applications.

Step 3: Verify the Total Cost

Don’t only look at the board price.

Add the price of:

MicroSD card case, power supply, and cooling cables

Project elements

Step 4: Examine the vendor

Select a reputable vendor or an authorized Raspberry Pi reseller.

Step 5: Examine Before Purchasing

Before placing your order, check at least two or three vendors.

Due to seller pricing and availability, prices in India are subject to regular fluctuations.

What Can You Make With Raspberry Pi?

The Raspberry Pi’s versatility is one of its greatest advantages.

These are some well-liked concepts.

1. Robotic Raspberry Pi

A robot can be constructed by connecting motors, sensors, and a motor driver.

While building the robot, students can study electronics and coding.

2. The Smart Home Initiative

Smart home experiments can be made with a Raspberry Pi plus sensors and gadgets.

You could, for instance, construct a system that regulates lighting or measures temperature.

3. The Internet of Things Project

The Raspberry Pi is helpful for Internet of Things projects since it can connect to sensors and the internet.

Students can gain knowledge about how gadgets gather and distribute data.

4. Projecting a camera

You can make projects like time-lapse cameras, computer vision studies, and monitoring systems by connecting a suitable camera.

5. Coding Initiatives

Learning programming is another benefit of the Raspberry Pi.

Beginning with basic Python programs, students can gradually advance to more complex projects.

Why Is Raspberry Pi Good for Students?

Learning becomes more useful using the Raspberry Pi.

Students can construct something with their hands rather than just reading about computers.

For example, in class, a student might study sensors. They can attach a genuine sensor to a Raspberry Pi and observe the results.

This could get better:

  • Problem-solving abilities
  • Thinking logically
  • Coding abilities
  • Originality
  • Knowledge of electronics
  • Project-building abilities

The popularity of Raspberry Pi in education, robotics, STEM education, and do-it-yourself projects can be attributed to this.

Raspberry Pi 4 vs Raspberry Pi 5: Which One Should You Choose?

When your budget permits, the Raspberry Pi 5 is typically a superior option for a new buy if you are choosing between the Raspberry Pi 4 and Raspberry Pi 5.

The Raspberry Pi 5 boasts enhanced I/O capabilities, a power button, a real-time clock connector, PCIe connectivity, and a speedier quad-core Arm Cortex-A76 processor.

The Raspberry Pi 4 can still be helpful for a variety of projects, though.

Select the Raspberry Pi 4 if

It’s reasonably priced.

Additional performance is not required for your project.

You already own accessories for the Raspberry Pi 4.

Your project or software is built around it.

Is Raspberry Pi Worth Buying in 2026?

In 2026, the Raspberry Pi can still be a highly helpful learning tool.

Students, instructors, makers, robotics learners, developers, and those who enjoy creating technological projects will find it very helpful.

Purchasing the appropriate model for your project is crucial.

The priciest Raspberry Pi is not always necessary.

A basic guideline is:

For a beginner project, less RAM may be sufficient.

Robotics and general coding: 4GB is a good option.

Advanced projects should take into account 8GB or 16GB.

How Techradiance Can Help Students Learn Raspberry Pi

Purchasing a Raspberry Pi is just the initial step.

When students use it to create projects, the true learning begins.

Through hands-on STEM projects, robotics, coding, and artificial intelligence, Techradiance facilitates students’ exploration of technology.

Students may comprehend the interplay between hardware, software, sensors, and programming through supervised project-based learning.

Students can learn by creating and testing their own projects rather than just learning computer principles by heart.

Final Thoughts

It’s crucial to know how much a Raspberry Pi Price in India, but you shouldn’t base your decision solely on cost.

Choose what you want to construct first. Next, select the appropriate Raspberry Pi model, RAM, accessories, and vendor.

The most powerful model is not necessary if you are a novice. You may start learning coding, robotics, IoT, and electronics with a suitable Raspberry Pi and the appropriate peripherals.

Additionally, keep this in mind if you’re a student:

The most expensive Raspberry Pi isn’t always the best. It is the one that enables you to study and create something beneficial.

The Raspberry Pi may become more than just a tiny computer with the correct direction from websites like Techradiance; it can become a tool for learning, exploring, and developing your own technological projects.

What Students & Teachers Say About Raspberry Pi Learning

Testimonials

“The Raspberry Pi greatly increased my interest in coding. I could employ sensors to create a functional project rather than just creating code. It made it easier for me to comprehend how electronics and coding interact.

— Student Aarav

“Our pupils found it easier to grasp robotics and IoT concepts because of the practical approach. They were inspired to experiment, ask questions, and come up with answers on their own through Raspberry Pi projects.

— Science Teacher Neha Sharma

“Even though I was new to coding, working on Raspberry Pi projects made learning easy and enjoyable. Building projects where I could see my code control actual components was something I particularly appreciated.

Rohan, a pupil

The Raspberry Pi is an excellent tool for hands-on STEM education. Through a single project, students can learn about electronics, sensors, programming, and problem-solving. This learning process is made simpler and more interesting by Techradiance’s advice.

— Teacher Priya Mehta

After working on Raspberry Pi projects, my child’s interest in technology increased. Thanks to the practical exercises, he could understand ideas that were hard to grasp from textbooks alone.

— A student’s parent

Frequently Asked Questions

The total cost exceeds the board price. A power supply, microSD card, case, cooling solution, connectors, and project components may be required. Therefore, what you wish to develop will determine your final budget.

Raspberry Pi is available for purchase from reputable Indian electronics vendors and Raspberry Pi Approved Resellers. For India, Raspberry Pi keeps an official list of authorized resellers.

Yes, Coding, robotics, electronics, the Internet of Things, and STEM concepts can all be learned using a Raspberry Pi. Students can learn by working on actual projects.

The Raspberry Pi 5 delivers improved performance and additional functionality for the majority of new projects. When the Raspberry Pi 4 is reasonably priced or is currently being used in a project, it can still be a viable choice.

The Raspberry Pi 5 with 4GB RAM is a sensible option for many novices. However, the project and budget determine which model is better.

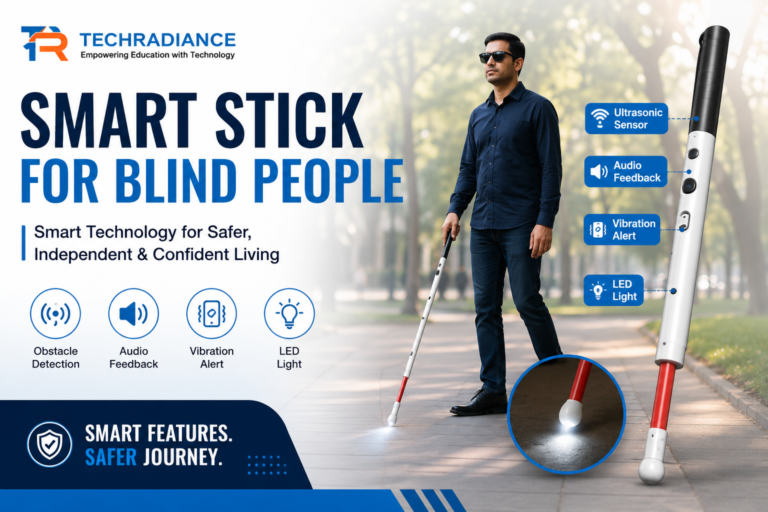
Smart Stick for Blind People: Features, Benefits & How It Works

Smart Stick for Blind People: Features, Benefits & How It Works

Imagine strolling down a path without the ability to see what’s ahead. A small rock, a barrier, a staircase, or a puddle could present a significant challenge. This is where technology can simplify everyday living.

A Smart Stick for Blind People with visual impairments is a technology-driven walking aid designed to assist blind people in identifying obstacles and navigating more safely. In contrast to a conventional walking stick, a smart stick utilizes sensors, a buzzer, vibrations, and occasionally other technologies to alert the user about items obstructing their way.

Smart sticks serve as an excellent illustration of how robotics, electronics, and programming can address real-world challenges. Students can even explore this technology by developing a smart blind stick project using

Author: Himanshu (Content Writer)

TABLE OF CONTENTS
1.What Is a Smart Stick for Blind People?
2.Why Is a Smart Stick Needed?
3.How Does a Smart Stick for Blind People Work?
4.What Are the Main Components of a Smart Blind Stick?
5.What Are the Main Components of a Smart Blind Stick?
6.What Are the Features of a Smart Stick?
7.What Are the Benefits of a Smart Stick for Blind People?
8.What Is a Smart Blind Stick Project?
9.How to Make a Smart Blind Stick Using Arduino?
10.Can Students Build a Smart Walking Stick for the Blind?
11.How Can Schools Teach Students About Smart Stick Technology?
12.Smart Stick vs Traditional Walking Stick
13.What Is the Future of Smart Stick Technology?
14.Student Testimonials
15.Final Thoughts: 

What Is a Smart Stick for Blind People?

A Smart Stick for Blind People is a supportive device that merges a conventional walking stick with advanced electronic technology. Typically, it has sensors that can identify barriers. When an obstacle is sensed, the device emits an alert through a buzzer or a vibration motor. This assists the user in recognizing that something is in close proximity. In simpler terms: A smart stick is a mobility aid that employs sensors and electronics to identify obstacles and notify a person with visual impairment. Depending on its configuration, a smart stick can recognize objects like walls, furniture, vehicles, stairs, or other impediments.

Why Is a Smart Stick Needed?

A conventional walking stick assists visually impaired individuals in sensing objects that are near the ground. However, it might not always identify obstacles that are at a higher level or situated further away. A smart stick can enhance this experience by providing additional information. 

Forexample, consider a person approaching a wall. A sensor embedded in the stick can recognize the wall before the individual reaches it, triggering a sound or vibration as a warning. This feature can facilitate navigation and offer extra safety measures. It’s crucial to understand that a smart stick serves as assistive technology, complementing rather than substituting mobility training, guidance, or other accessibility resources.

How Does a Smart Stick for Blind People Work?

The operation of a smart stick designed for visually impaired individuals can be clearly understood through a step-by-step explanation.

Step 1: The Sensor Identifies an Obstacle

An ultrasonic sensor is typically installed on the walking stick to detect objects.

The sensor emits ultrasonic waves. When these waves encounter an object, they reflect back.

Step 2: The Controller Analyzes the Data

The information from the sensor is processed by a microcontroller.

In many student projects, an Arduino is utilized as the controller. It interprets the sensor data and determines if an obstacle is nearby enough to trigger a warning.

Step 3: The System Issues a Notification

When an obstacle is identified, the controller activates a signaling device.

  • This could be:
  • A buzzer
  • A vibration

What Are the Main Components of a Smart Blind Stick?

Depending on the design, the components may change. A simple smart blind stick project could consist of:

The Arduino board:  Serves as the project’s brain.

Ultrasonic sensor: Assists in identifying obstructions in the vicinity.

Buzzer: When an obstruction is discovered, a buzzer sounds.

Vibration motor: Offers a tangible alert.

Battery: Provides the gadgets with electricity.

Connecting wires: Join the various parts.

Switch: Assists in turning the system on and off.

Walking stick: Supports the electronic parts.

Additional sensors, GPS, Bluetooth, water detection, and mobile communication are examples of more sophisticated designs.

What Are the Features of a Smart Stick?

The model and technologies used determine a smart stick’s features. Typical characteristics include:

1. Detection of Obstacles

The capacity to identify things in the user’s route is the primary feature.

2. Audio Warnings

When an obstruction is recognized, a buzzer can sound an alert.

3. Vibration Warnings

Through touch, a vibration motor can give a silent warning.

4. Design for Portability

It is possible to create a smart stick that is both lightweight and portable.

5. Control Based on Arduino

Arduino can be used in educational versions to process sensor data and manage the warning system.

6. Detection of Water

Sensors that identify water on the ground may be included into some complex designs.

7. Several Sensors

Obstacles in various directions can be detected using multiple sensors.

Depending on the project’s requirements and goals, these functionalities may be included.

What Are the Benefits of a Smart Stick for Blind People?

A Smart Stick for Blind People can provide a number of practical advantages.

Increased Awareness of Obstacles

The stick helps the user become aware of objects that could be challenging to notice with a regular stick alone by detecting specific barriers and sending out an alarm.

Simple Alerts

Alerts that employ sound or vibration can convey information without the user having to look at a screen.

Beneficial Assistive Technology

For those with vision impairments, a smart stick might serve as an extra tool.

Students’ Opportunity to Learn

Students can learn about sensors, circuits, programming, Arduino, and problem-solving by building a smart stick.

Use in the Real World

Pupils are able to comprehend that technology is more than just computers and video games. It can also be applied to tackle significant challenges in daily life.

Scope for Improvement

Additional features like GPS, mobile connectivity, water detection, or other sensors can be added to a simple project.

What Is a Smart Blind Stick Project?

An educational or useful project that enhances a standard walking stick with electrical components is called a Smart blind stick project.

Students can attach an Arduino board to an ultrasonic sensor, for instance. The distance between the stick and an obstruction can be measured by the sensor. When the barrier is within a predetermined range, the Arduino can then turn on a buzzer or vibration motor.

Because students can see their programming and electronics working on a real-world problem, this kind of project is popular in school science exhibitions, robotics activities, STEM classrooms, and innovation initiatives.

How to Make a Smart Blind Stick Using Arduino?

Smart Stick using Arduino

You can connect an Arduino board, an alarm device, and an ultrasonic sensor to create a simple Smart blind stick.

In general, the procedure is:

Arduino → Sensor → Processing → Alert

The Arduino is first linked to the ultrasonic sensor. The distance that the sensor measures is programmed into the Arduino.

The Arduino notifies the buzzer or vibration motor when the measured distance falls below the chosen safety range.

For instance, the vibration motor may turn on or the buzzer may begin to sound if an obstruction approaches the stick.

When working with batteries, wiring, and electronic components, students should construct such projects under the supervision of a teacher or robotics instructor.

Can Students Build a Smart Walking Stick for the Blind?

Yes, for children, a simple smart walking stick for the blind might be an excellent STEM and robotics learning project.

It is not necessary for students to begin with a complex design. They can start with just one alarm system and one sensor.

After they grasp the fundamentals, they can investigate more complex concepts like:

  • Including several sensors
  • Including water detection
  • GPS technology
  • Linking the gadget to a mobile program
  • Including rechargeable batteries
  • Increasing the weight and size of the stick
  • generating various vibrational patterns

The most crucial step is to comprehend the issue before coming up with a secure solution.

How Can Schools Teach Students About Smart Stick Technology?

Smart stick projects are an effective way for schools to expose kids to a number of key STEM concepts.

For children, a simple smart walking stick for the blind might be an excellent STEM and robotics learning project.

It is not necessary for students to begin with a complex design. They can start with just one alarm system and one sensor.

Pupils can discover:

Science: The operation of sensors and ultrasonic waves.

Technology: How electronic gadgets can resolve practical issues.

Engineering: The process of creating and refining a functional device.

Programming: The process by which Arduino interprets sensor data and manages outputs.

Mathematics: How sensors use measurements and distance.

As a result, the project is no longer merely a model. Students get the chance to learn how many topics can complement one another.

Through robots, artificial intelligence, coding, and STEM-based learning activities, students can investigate such practical ideas at Techradiance. Instead of only reading about technology, practical projects allow students to develop and experiment with it.

Smart Stick vs Traditional Walking Stick

Traditional walking sticks primarily help in the physical detection of objects and ground changes.

For children, a simple smart walking stick for the blind might be an excellent STEM and robotics learning project.

FeatureTraditional Walking StickSmart Stick
Physical supportYesYes
Obstacle detectionMainly through physical contactCan use sensors
Sound alertNoPossible
Vibration alertNoPossible
ElectronicsNoYes
Arduino integrationNoPossible
Technology-based learningLimitedHigh

A smart stick does not negate the utility of a conventional walking stick. Rather, it illustrates how technology can enhance an already-existing tool with additional features.

What Is the Future of Smart Stick Technology?

Assistive technology has the potential to go even further in the future.

For children, a simple smart walking stick for the blind might be an excellent STEM and robotics learning project.

It is not necessary for students to begin with a complex design. They can start with just one alarm system and one sensor.

Future smart sticks might integrate sensors with speech technologies, mobile apps, AI, GPS, and connected gadgets.

For example, a future system might employ audio or a linked mobile device to give the user information about their surroundings.

However, safety, dependability, affordability, comfort, and usability should always be the top priorities for cutting-edge technology.

Adding additional technology shouldn’t be the only objective. Developing technology that actually benefits people should be the aim.

Student Testimonials

“I learned how an ultrasonic sensor operates thanks to the smart stick project. For children, a simple smart walking stick for the blind might be an excellent STEM and robotics learning project.

It is not necessary for students to begin with a complex design. They can start with just one alarm system and one sensor.

Seeing the buzzer react when an object approached was entertaining.

Aarav, a student of robotics at school

“I thought Arduino was all about coding before this project. I gained an understanding of how programming, sensors, and hardware interact after completing the project.

— Ananya, a student of STEM

“Because we were making something that could solve a real-world problem, the project made robotics feel useful.”

Rohan, a student in the School Innovation Program

Note: Before publication, verified consumer or student feedback should be used in place of these illustrative student testimonials for instructional content.

Final Thoughts: 

A simple yet significant example of how technology may be used to solve real-world problems is a Smart Stick for Blind People. It can offer more details about impediments by integrating sensors, a microprocessor, and alert systems with a walking stick.

Another great option for children to learn about Arduino, sensors, programming, electronics, and engineering is through a smart blind stick project.

The most crucial lesson is that technology should solve actual issues and make life easier, whether it is a simple smart stick for blind users or a more sophisticated smart blind stick using Arduino.

Students can investigate robotics and STEM projects that link academic ideas with real-world applications through Techradiance’s experiential learning programs.

Assistive technology has a bright future ahead of it, and student efforts from today may serve as the foundation for future advancements.

Frequently Asked Questions

An assistance walking device called a “smart stick” uses sensors and electronics to identify specific hazards and send out notifications via vibration or sound.

A smart blind stick uses sensors to detect obstacles. A controller processes the sensor information and activates an alert, such as a buzzer or vibration motor, when an obstacle is detected.

Yes, with an Arduino, an ultrasonic sensor, a buzzer or vibration motor, a battery, and other electronic parts, students can build a simple smart blind stick.

Because it can measure the distance between the sensor and an obstruction, an ultrasonic sensor is frequently utilized in educational smart stick projects.

By using vibration or sound alerts, a smart walking stick can increase obstacle awareness. Additionally, it can be helpful for learning about robotics, electronics, sensors, and Arduino.

No. One could classify a smart stick as an assistive technology. It shouldn’t be used in place of mobility instruction, expert advice, or other accessibility resources.

Best Automatic Plant Watering System Using Arduino in 2026

Best Automatic Plant Watering System Using Arduino in 2026

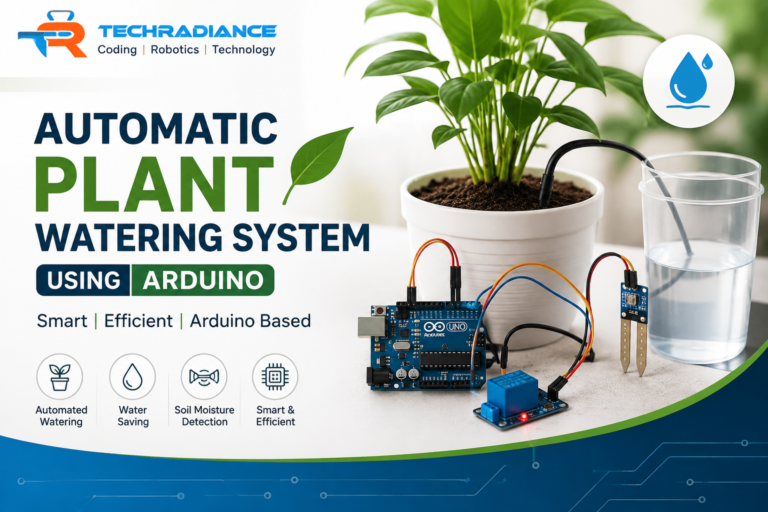
Plants need water to grow; however, watering them daily isn’t always easy. Sometimes we forget to water them, and often we overdo it. An Automatic Plant Watering System Using Arduino can solve this issue by analyzing the moisture level in the soil and supplying the plant with water when it is in need of it.

This is an easy and effective electronics project that is suitable for school children as well as robotics labs, STEM laboratories, and beginners who wish to master Arduino.

In this article, we will discuss what an automated plant watering system does, how it functions, why it’s useful, what components are needed to build it, how students can make it, and how it can be made smarter by enhancing it into a machine for watering plants.

Author: Himanshu ( Content Writer)

TABLE OF CONTENTS
1.What Is an Automatic Plant Watering System Using Arduino? 
2.How Does an Automatic Plant Watering System Work?
3.Why Do We Need an Automatic Plant Watering System?
4.Components Required for the Project 
5.How to Make an Automatic Plant Watering System Using Arduino
6.What Is the Role of Arduino in the Project? 
7.What Is a Smart Plant Watering System?
8.Automatic Plant Watering System vs Manual Watering 
9.Benefits of an Automatic Plant Watering System 
10.How Can Students Improve This Project?
11.Where Can This Plant Watering System Be Used?
12.What Do Students Learn From This Project?
13.Testimonials From Student Project Learning 
14.Why Choose Techradiance for Robotics and STEM Projects?
15.Final Thoughts
Home » Blogs & Highlights

What Is an Automatic Plant Watering System Using Arduino? 

An Automated Plant Watering System using Arduino is a program that automatically waters a plant when the soil becomes dry.

The system uses a soil moisture sensor to measure the amount of water in the soil. The sensor relays this information via an Arduino board. When the soil becomes too dry, the Arduino turns on a small water pump. The pump pumps liquid water into the.

If the soil is moist enough, the Arduino switches the pump off.

In simple terms:

Dry soil Sensor detects dryness; Arduino pumps water to the plant. If the soil is wet, the Arduino shuts down the pump

This makes the project easy sufficient for kids to grasp while teaching students about programming, sensors, electronic devices, automation, and electronics.

How Does an Automatic Plant Watering System Work?

The functioning of an automated plant watering system project is based on soil moisture.

Here’s the fundamental process:

  1. The soil moisture sensor is placed in the soil.
  2. The sensor measures the level of moisture.
  3. Arduino is able to read the sensor’s information.
  4. When the ground is not dry, the Arduino transmits an alert to the motor driver or relay.
  5. The water pump is activated.
  6. The plant is supplied with water via the pipe that is small.
  7. If the soil is sufficiently saturated, the Arduino stops the pump.

The system will repeat the process at any time that the soil gets dry.

This is the reason why this project is also referred to as an automatic irrigation system project. Instead of a human being making the decision of what time is right to water plants, the system decides on the basis of water level.

Why Do We Need an Automatic Plant Watering System?

Have you ever been unable to water your plants?

It’s a common occurrence for almost everyone.

Plants may become weak if they don’t receive sufficient water. However, providing too much water could also harm some plants.

An automated plant watering system aids in maintaining a routine of watering.

It is particularly useful for the following scenarios:

  • You’re far from your home.
  • You have a lot of plants.
  • It is often difficult to remember to water your plants.
  • You’d like to reduce your water usage.
  • You want your students to be educated about automation.
  • You’re looking to design an intelligent gardening plan.

The main idea behind this project is quite simple: to water the plant only when it actually requires water.

Components Required for the Project 

A simple plant watering system is built using components that are readily available.

Main components:

ComponentPurpose
Arduino UnoControls the entire system.
Soil Moisture SensorVerifies whether the soil is moist or dry.
Mini Water PumpTransfers water to the plant.
Relay ModuleSwitches the pump on and off
Water ContainerWater storage
Connecting TubesTransports water to the plant
Jumper WiresConnects components
BreadboardAids in making connections for temporary periods
Power SupplyProvides electricity

Students can begin with a basic setup, and then add additional devices and sensors.

How to Make an Automatic Plant Watering System Using Arduino

The process of building the project can be broken down into a couple of easy steps.

Step 1: Prepare the Plant

Choose a small-sized plant and put it in a pot. Be sure that the plant is planted in adequate soil.

Step 2: Place the Moisture Sensor

Place your soil-moisture sensor in the soil around the plant’s roots.

The sensor will determine the amount of moisture present in the soil.

Step 3: Connect the Sensor to Arduino

Connect the sensor to the Arduino board in accordance with the pins that are required by the sensor.

The sensor relays information to the Arduino. Arduino can read it.

Step 4: Connect the Water Pump

Connect the water pump with a suitable relay or motor control circuit.

The pump shouldn’t be directly connected to an Arduino pin, as the pump requires more current than what the Arduino pin is able to safely supply.

Step 5: Add the Water Container

Maintain a small water tank close to the plant. Install the pump in the container. Connect the pump’s tube to the pot for the plant.

Step 6: Upload the Program

Upload or write the Arduino program, which tells the Arduino when to stop and start the pump.

Step 7: Test the System

Let the soil dry and then observe what happens.

The sensor should be able to detect a dry state, and the Arduino will start the pump.

Pour water into the soil and observe if the pump stops when the desired moisture level has been attained.

What Is the Role of Arduino in the Project? 

Arduino functions as the central brain for the system.

The moisture sensor collects data but does not determine what to do with it.

Arduino detects the sensor’s reading and then follows the directions in the program.

For instance:

“If your soil appears dry, then turn on the pump.”

And:

“If the soil is moist enough, it is time to turn off the pump.”

Students are taught a crucial notion in robotics and automation:

Input – Processing – Output

  • For input: Sensor for moisture in soil
  • Processing: Arduino
  • Output: Water pump

This concept is utilised in a variety of real-world automated machines.

What Is a Smart Plant Watering System?

Smart Plant Watering System

A basic automated system can water a plant on a regular basis. A smart plant watering system could go an extra step.

It could include additional options, for example:

  • Monitoring of temperature
  • Monitoring of humidity
  • Water-level detection
  • LCD display
  • Mobile notifications
  • Wi-Fi connectivity
  • IoT monitoring
  • Automated watering schedules
  • Multiple plant monitoring

For instance, an Arduino-based device can connect to the IoT platform. Users can check the conditions of the plant with their smartphone.

This transforms a basic school project into a sophisticated smart agriculture or IoT project

Automatic Plant Watering System vs Manual Watering 

Manual WateringAutomatic System
Does one require a personFunctions in an automatic way
It is easy to forgetCan monitor the moisture conditions
May use too much waterReduces the need for watering
Requires regular attentionDo not require the same attention every day.
It is suitable for a small number of plantsThe possibilities are endless for expanding the number of plants

The objective is not to replace human beings. Instead, automation can help people better manage plants.

Benefits of an Automatic Plant Watering System 

An automatic plant watering system project provides many advantages for both gardeners and students.

1. Saves Time

The system allows plants to be watered without a person standing nearby.

2. Helps Avoid Overwatering

The system is programmed to supply water to plants when the soil reaches an appropriate level of dryness.

3. Helps Save Water

Water can be pumped out according to the condition of the water instead of irrigating plants excessively.

4. Great for Student Learning

Students can learn programming with Arduino sensors, circuits, and sensor automation, and problem-solving in one project.

5. Can Be Upgraded

Students may include IoT displays, IoT sensors, as well as mobile alerts in the future.

6. Useful for STEM Education

The project combines engineering, science, technology, and maths through a single, practical task.

How Can Students Improve This Project?

Once they have mastered the fundamental method, they can build it more sophisticated.

Here are some intriguing ideas:

Add a Water-Level Sensor

A sensor that monitors water levels can inform the system that the tank for storage is empty.

Add an LCD Display

The display may show information like:

Soil Moisture: 65% Pump: OFF

Add Temperature and Humidity Sensors

Students are able to gather additional details about the environment of the plant.

Add IoT

With the right equipment, students are able to send sensor data to a dashboard online or a mobile app.

Add Multiple Plants

The most advanced systems can be able to monitor multiple plants and supply water to pots in different locations.

These upgrades can transform a simple automatic irrigation system project into a fully smart model of agriculture.

Where Can This Plant Watering System Be Used?

This project is a great idea to use in a variety of places, such as:

  • Homes
  • School gardens
  • STEM labs for schools
  • Robotics labs
  • Greenhouses
  • Small farms
  • Nurseries
  • Terrace gardens
  • Indoor gardens

Schools could also utilise the project as an interactive project for students.

What Do Students Learn From This Project?

This project isn’t just about watering plants.

Students can study:

  • Arduino programming
  • Basic electronic
  • Sensor technology
  • Automation
  • Problem-solving
  • Logical thinking
  • Circuit connections
  • Environmental awareness
  • Conservation of water
  • Basic IoT concepts

Students also learn about how technology can help solve everyday problems.

This is among the most significant benefits of project-based STEM learning.

Testimonials From Student Project Learning 

“This project has helped me to understand the way sensors and Arduino are interconnected. It was much easier to grasp by seeing the pump working .” – Students, School STEM Project

“I loved the idea of automated watering as it solved a real issue. We also learned about coding while learning about water and plants.
student, Robotics Learning Program

“The project was an interesting experience in electronics for me. I was able to understand how Arduino can read data from sensors and control the other gadget .”>
-” Students, School Robotics Lab

“Building the system for watering helped help us comprehend the process of automation in a straightforward method. We were able to test the system to find any flaws, then enhance it .” -“ Student STEM activity

“We began with a basic model for watering the plant, and later we thought about the possibility of adding IoT features. It helped us understand how a simple project could become a larger tech answer .”>
-” – Students, Innovation Project

Why Choose Techradiance for Robotics and STEM Projects?

Techradiance is a place where students can learn about technology. Techradiance students are able to explore technologies through hands-on and project-based learning.

Instead of reading only about robotics, programming, AI, IoT, and STEM, students can gain knowledge by creating projects, testing, and improving real-world projects.

Projects like an  Automatic Plant Watering System Using Arduino help students understand the ways technology can be used to solve real-world issues.

Techradiance is a company that focuses on the areas of learning that require hands-on involvement, such as:

  • Robotics
  • STEM Education
  • Artificial Intelligence
  • Coding
  • IoT
  • Electronics
  • Innovation Projects
  • Robotics Competitions
  • School Technology Labs

The idea is to aid students in learning about technology through creating useful products using it.

Final Thoughts: 

An Automatic Plant Watering System Using Arduino. This is a very simple but effective project to learn automation.

It teaches students how a sensor could gather data, how Arduino makes an informed decision, and how a pump acts.

The project could start with a simple automated watering system for plants but later evolve into a smart system for watering plants using IoT mobile monitoring, temperature sensors, water level detection, and many other intelligent features.

It is an excellent example of how project-based learning could bring together electronic coding and environmental science, robotics, in addition to STEM education.

The most important thing to learn is not about what to do with building the project. It’s about learning how to ask questions.

“What issue is technology able to solve, and how can we develop an answer?”

The real challenge begins.

Frequently Asked Questions ( FAQ’S) 

A soil moisture sensor is a device that measures the soil’s moisture. Arduino analyses the sensor’s data and turns on the pump if the soil is too dry. 

Yes. A soil moisture sensor is a device that measures the soil’s moisture. Arduino analyses the sensor’s data and begins the pump if the soil is too dry. 

Yes. The project’s basic structure is appropriate for students learning robotics, electronics or STEM-related concepts. Teachers must be in charge of electrical connections and water-related experiments.

It will help to reduce the need for watering since the system can be programmed to react to soil moisture, rather than following a set watering schedule

Yes. Students can also add Wi-Fi or IoT equipment to monitor moisture and other important data remotely. 

Renewable Energy Project Ideas for Science Exhibition 

Renewable Energy Project Ideas for Science Exhibition 

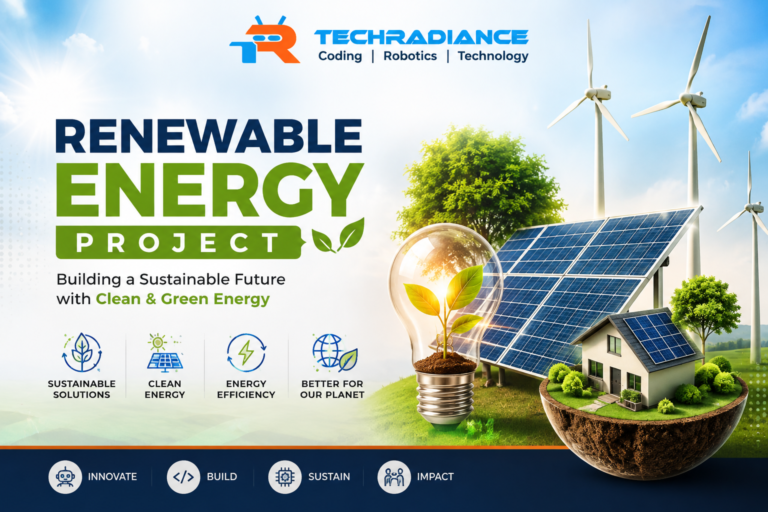
Are you searching for the top renewable energy project for your school’s science fair? You’re in the right spot. This blog, Techradiance, can provide you with easy, fun, and simple renewable energy project ideas that you can create at your institution. These ideas are great for kids, as well as for fifth graders who can comprehend and test them.

Let’s find out everything we can about renewable energy projects, step by step.

Author: Himanshu ( Content Writer)

TABLE OF CONTENTS
1.What is a renewable energy project?
2.Why Should Students Choose Renewable Energy Projects?
3.How to Choose the Right Renewable Energy Project Idea
4.Best Renewable Energy Project Ideas for Science Exhibition
5.Benefits of Building a Renewable Energy Project
6.Renewable Energy Projects in India: Why It Matters
7.What Schools Say About Techradiance
8.Final Thoughts
9.Frequently Asked Questions (FAQs)

What is a renewable energy project?

A renewable energy project is a model, or even a tiny device, that demonstrates how we can generate energy from natural resources such as wind, sunlight, and water. These sources of energy will never end. This is why they are referred to as “renewable”.

For instance:

  • The sun provides us with solar energy of the sun.
  • The wind is the source of our wind energy.
  • Water that flows gives us hydro energy.

Students create models made from these sources. It is referred to as a renewable energy science project. These projects allow us to understand how nature could be used to power our schools, homes, and cities without causing harm to the environment.

Why Should Students Choose Renewable Energy Projects?

Many students are asking, “Why should I pick a renewable energy source over any other subject?” Here’s the reason:

  1. It is a solution to an actual problem that the world is in need of: renewable energy that is clean, and your project offers a way to solve it.
  2. It is simple to explain; judges and teachers are able to understand quickly due to its connection to everyday life.
  3. It educates you about the world and teaches you how to help save the planet while you study the science.
  4. It’s in huge demand. Every year, the renewable projects of students receive top awards in science fairs due to being distinctive and beneficial.
  5. It develops real abilities. You learn about motors, circuits, sensors, and clean technology.

At Techradiance, we tell students to pick a relevant subject. ‘Renewable energy is not only an idea, but it’s the future.

How to Choose the Right Renewable Energy Project Idea

Before you decide on your project, you should ask these questions:

  • Do I know the way this energy source functions?
  • Do I have the necessary materials quickly?
  • Do I have the ability to explain this project to my judges in a few phrases?
  • Does my project provide a clearly beneficial effect on society?

After you have answered these questions, you’re ready to select from our list of renewable energy project ideas below.

Best Renewable Energy Project Ideas for Science Exhibition

Here are some simple and fun ideas for projects that you can test:

1. Solar-Powered Fan

Make a small fan that operates using the solar panel instead of electricity. This illustrates how sunlight can provide power to machines used in everyday life.

2. Solar Water Heater Model

Demonstrate how sunlight can heat water without the use of electricity or gas. This is an excellent idea to save energy in your home.

3. Wind Turbine Model

Create a small windmill with plastic or cardboard blades that are connected to a motor. If the wind blows, it turns the blades and creates electricity.

4. Mini Hydro Power Model

Demonstrate how water flowing through the air turns a wheel attached to a generator, generating electricity. This is an easy but effective demonstration.

5. Solar Oven

Make a small box with cardboard and foil. It uses light to cook or cook food. This is among the most loved activities among young students.

6. Bicycle Generator

Demonstrate how a bicycle can produce electricity with a small engine. This is a way to connect renewable energy to everyday activities.

7. Solar-Powered Charger

Design a small charging station with a solar panel to charge mobile phones or a small battery.

These projects are easy to construct, inexpensive, and ideal for those who are just beginning. They’re also perfect whether you’re in the 5th grade or Class 12.

Benefits of Building a Renewable Energy Project

Let’s look at the advantages of working on this kind of project:

  • You can learn about science through practical applications and not only theories from books.
  • You learn the process of making energy and how it can be conserved.
  • You can build confidence by presenting before teachers and judges.
  • You can contribute to a more sustainable tomorrow by learning about eco-friendly options.
  • You make a statement in competitions because renewable energy subjects are always a hit and stunning.

At Techradiance, the robotics and STEM labs let students explore these ideas in a hands-on manner using real-world kits as well as expert guidance and proper guidance.

Renewable Energy Projects in India: Why It Matters

renewable energy projects in india​

India is striving to make use of more renewable energy. Wind farms and solar parks, as well as hydropower plants, are being constructed throughout the nation. This is the reason why renewable energy projects in India are becoming increasingly well-known in schools.

When students construct these kinds of projects, they are not just doing their homework. They are also learning about the goals of India’s government – such as the use of solar and wind power to lessen pollution and also rely less on fossil fuels.

Techradiance is a partner in this cause by helping schools establish STEM as well as robotics laboratories so that students can learn about the concepts of renewable energy with active learning.

What Schools Say About Techradiance

“Our students constructed a solar-powered model to display their work in a science exhibit with the help of their STEM laboratory, Techradiance, that we have set up at our school. They understood the concept of renewable energy a lot better after building the model themselves.” — Shanaya, Silicon Public School

“Techradiance’s instructors helped our students step-by-step as they were working on the renewable projects they had in mind. The assistance made a huge difference in the way that students were during the exhibit.” — Ritika, Red Roses Public School

Final Thoughts

Picking the renewable energy  project in your science fair is a wise choice. It’s easy to construct and fun to build, and will help you understand the way that the world is moving toward clean energy. If you choose a solar oven, a wind turbine, or even a miniature hydro model, you’re learning the skills you need for the future.

If your school would like to create a proper STEM and robotics laboratory in which students can develop real renewable energy projects, and much beyond, Techradiance is here to aid you.

Book a Free Lab Consultation with Techradiance 

Frequently Asked Questions (FAQs)

A solar-powered air conditioner or solar oven is among the simplest tasks to complete. It requires only a few materials and is simple to explain.

Yes! Ideas like a solar oven or bicycle generator are easy and safe for children to build with adult assistance. 

They teach us to make use of natural resources like sunlight, wind, and water to create pure 

The solar energy option is the largest and most well-known option due to the fact that sunlight is readily available all around, and solar panels are simple to set up in small-sized models.

Techradiance supplies robots and STEM labs in schools, and kits and trainers so that students can create real, functional renewable energy models with appropriate instructions.

In-house vs. Outsourced Lab Setup for Schools ( 2026) 

In-house vs. Outsourced Lab Setup for Schools ( 2026) 

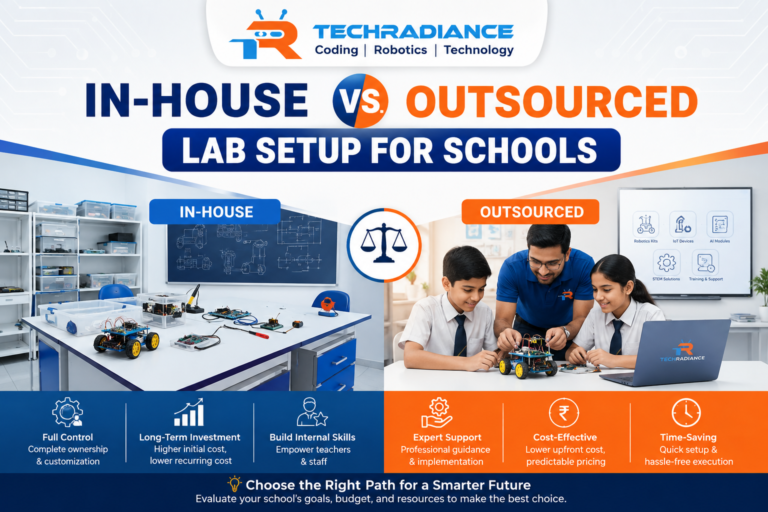
Setting up an innovative lab in schools—whether a robotics lab, a STEM lab, or even an AI lab—is a huge decision. Once a school has decided to construct one, the next question is asked: should we build the lab on our own, or Outsource School Lab Setup to a company that already has the know-how to set it up?

Both choices can be successful. However, they differ in cost, time, and quality, and the amount of stress your staff and teachers undergo. We’ll explain the two options in plain terms so that you can make the best decision for your school.

Author: Himanshu ( Content Writer)

TABLE OF CONTENTS
1What Does It Mean to Outsource School Lab Setup?
2.Why Are Schools Even Thinking About This Now?
3.In-House Lab Setup: What It Actually Looks Like
4.Outsourced Lab Setup: What It Actually Looks Like
5.School Lab Setup Vendor vs In-House Team: Quick Comparison 
6.Should Schools Outsource Lab Setup?
7.Pros and Cons of Outsourcing School Labs
8.Cost of In-House Lab Setup vs Vendor
9.How to Choose a Lab Setup Partner for Schools
10.Robotics Lab Setup Company vs DIY
11.Benefits of Outsourcing STEM Lab Setup
12.How Techradiance Helps Schools with Lab Setup
13.What Schools Say About Us
14.Final Thoughts

What Does It Mean to Outsource School Lab Setup?

Let’s begin with the basics. If an institution outsources lab setup, this means that the school contracts with an outside firm to design, plan installation, and frequently provide training for teachers to use the lab, instead of coordinating everything on its own.

This differs from having it done in-house, in which the school’s staff buys equipment, prepares the classroom, creates the curriculum, and then trains teachers independently in a step-by-step manner.

Imagine it as building a home. You might be able to learn about plumbing wiring, carpentry, and plumbing yourself. It is also possible to hire professionals who know how to perform the task efficiently and quickly. Both can get you a house. However, the path is quite different.

Why Are Schools Even Thinking About This Now?

Many schools across India are establishing robotics, AI, STEM, and other labs that focus on skill development due to NEP 2020 and CBSE’s push to provide hands-on, real-world learning. However, the majority of schools do not have a team of in-house robotics experts as well as curriculum designers or lab engineers, sitting around. Therefore, the issue of the in-house lab vs. outsourced lab setup is a pressing issue for school principals, school leaders, or management team members.

In-House Lab Setup: What It Actually Looks Like

In-house labs mean that your school

  • Purchases equipment directly from several suppliers
  • The room layout is designed independently
  • Creates or copies curriculum
  • Internally trains teachers
  • Manages repairs, replacements, and upgrades each year

The benefit: You have full control. You decide everything.

The tough element: It takes a considerable amount of time, study, and trial and error, and the majority of schools do not have a full-time employee whose task is “robotics lab specialist”. This can lead to delays, incorrect purchase of equipment, or a room that looks nice but isn’t used by the teachers.

Outsourced Lab Setup: What It Actually Looks Like

Home » Blogs & Highlights

If a school goes with hiring a lab setup company for schools, the business usually manages everything:

  • Design and layout of the lab
  • Equipment sourcing (already tested and ready for school)
  • The curriculum is mapped to the guidelines of CBSE/NEP.
  • Teacher Training
  • Maintenance and support on an ongoing basis

This is a turnkey lab setup for schools in India, which means that the school won’t have to handle the smallest of things. The company will provide a fully functional lab.

School Lab Setup Vendor vs In-House Team: Quick Comparison 

FactorIn-House TeamOutsourced Vendor
Time to set upSlower (trial and error)Faster (already skilled)
Equipment qualityDepends on the knowledge of staff.School-specific equipment that has been tested
CurriculumIt must be constructed from scratch.Made-to-order, updated frequently
Teacher TrainingThe school must organise it separately.Usually, they are included.
Support continues.The school handles repairs alone.The vendor provides maintenance/AMC.
Staff members are given a frontline effort.HighLow

Should Schools Outsource Lab Setup?

This is a straightforward, truthful response: if your school has no in-house robotics/STEM professionals, outsourcing is often the better and more efficient option. It saves your teachers from having to learn a new skill in addition to their duties as teachers and reduces the possibility of wasting money on inappropriate equipment.

But if your institution has a strong technical staff and has the time to construct things step-by-step, it is possible for an in-house setup to be a good idea too. It is just a bit more time-consuming to achieve the same standard.

Pros and Cons of Outsourcing School Labs

Pros:

  • Quicker set-up (weeks instead of months)
  • Equipment selected by those who’ve used this equipment many times before
  • The curriculum is already aligned with the CBSE/NEP
  • Teachers receive proper training, not the whims of a few.
  • Continuous support for when something fails

Cons:

  • A little less “custom” influence over each small choice
  • Trusting an outside party is essential.
  • This is a cost for service that goes beyond equipment costs

For the majority of schools, the advantages far outweigh the consin particular since the “cons” for outsourcing are much less than the risk of putting an internal setup wrong.

Cost of In-House Lab Setup vs Vendor

This is often the first question management at schools is asked. Here’s the real picture:

An in-house lab setup might appear more cost-effective on paper since you’re only paying for the equipment. But the hidden costs are a lot more expensive — faulty purchases, time spent by staff looking for information, delayed timelines, and lack of curriculum support.

A vendor-led set-up is clearer in its upfront price, but it typically includes the equipment, curriculum training, support, and maintenance all in one bundle. If you look at the total price (not only the equipment costs), the outsourced setups usually are more cost-effective over the long term.

How to Choose a Lab Setup Partner for Schools

If your school chooses to work with one of the vendors and you’re looking for a way to select the best one:

  1. Review their past experiences: Have they had experience working in similar schools to ones like yours (CBSE, ICSE, similar age groups)?
  2. Find out about the curriculum: Do they have it already made and up-to-date, or do they just provide equipment?
  3. Discuss teacher training: Will your teachers be taught to manage the lab with confidence?
  4. Request after-sales assistance: What happens if the equipment fails after six months?
  5. Get references and talk with other schools they’ve worked with.

A reputable school lab setup company in India can happily respond to all five questions without hesitation.

Robotics Lab Setup Company vs DIY

Robotics Lab Setup Company

The robotics labs are more complex than a typical classroom setting — they include sensors, coding kits and controllers, as well as safety considerations. Making these do-it-yourself setups without prior knowledge can result in an impressive lab at first but is less utilised after a couple of months because the teachers don’t feel confident in working with the equipment.

The robotics lab setup company eliminates this risk by managing the technical setup as well as the teacher training in tandem to ensure that the lab remains functional and productive every year, and it’s not only for official opening photographs.

Benefits of Outsourcing STEM Lab Setup

  • It saves the school’s management team time and stress
  • Lowers the risk of purchasing the incorrect or obsolete equipment
  • It comes with a course that is more than machines
  • Makes teachers feel confident with the right education
  • Often, long-term support is provided to ensure that the lab doesn’t stand idle after a few years

School STEM Lab Outsourcing in India — A Growing Trend

All over India, more schools, from CBSE up to ICSE as well as state boards, are opting to outsource their robotics, STEM, and AI labs, instead of creating the labs from scratch. This is due to schools wanting to concentrate on teaching and not managing equipment and technical project logistics. 

How Techradiance Helps Schools with Lab Setup

Techradiance partners with school districts across India to establish robotics, AI, STEM, AR-VR, EV, and skill-development labs that provide a complete turnkey solution. This means that schools receive equipment and a syllabus aligned to CBSE/NEP with trained teachers, as well as ongoing support through one source.

We’ve worked with, including Delhi Public School and Billabong High International School, as well as Edify World School, to make this transition effortless.

What Schools Say About Us

“Techradiance helped make the whole process simple, from planning to installing to assisting our teachers. Our students are truly more involved now.” — Shanaya, Silicon Public School

“The assistance didn’t end even after we set up. Techradiance’s staff has been responsive anytime we’ve needed assistance in the classroom or with equipment.” — Ritika, Red Roses Public School

“We were looking for a partner who knew both the technical as well as academic aspects of STEM education. That’s exactly what we received.” — Himanshu, DPS Public School.

Final Thoughts

Both outsourced and in-house lab setups are able to work in most institutions; outsourcing school lab setup is faster and more reliable, as well as less stress-inducing for the teachers and the management. It’s not only about purchasing equipment; it’s about making sure that the lab is being used each year properly.

When your organisation is looking into robotics, AI, or STEM lab setup and is looking for an expert partner to handle everything from curriculum to equipment to teacher education, Techradiance can help.

 Book a free lab consultation with Techradiance today. 

Frequently Asked Questions ( FAQ’S)

This is when you contract an outside firm to build, construct, and train personnel for the lab at your school instead of doing everything with your own staff. 

In most situations, particularly when schools don’t possess internal technical experts. It reduces time, eliminates errors, and comes with training as well as support.

In most situations, particularly when schools don’t possess internal technical experts. It reduces time, eliminates errors, and comes with training as well as support. 

Experience in schools and curriculum quality, teacher education, and after-sales service. 

In most schools, yes, because it incorporates the equipment, curriculum, as well as instruction, which means that the lab is used properly, not simply installed. 

Smart Irrigation System Using Arduino: A Beginner’s Guide (2026)

Smart Irrigation System Using Arduino: A Beginner’s Guide (2026)

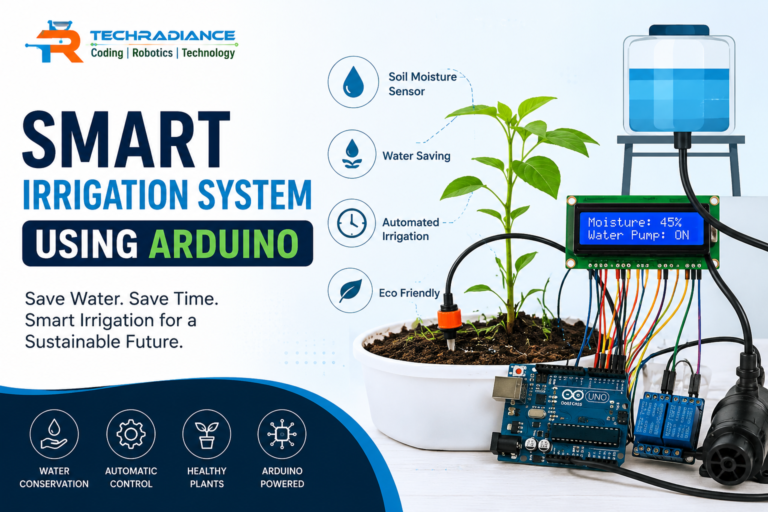
Imagine a plant that receives water on its own when the soil is dry. It is not necessary to inspect the plant again. This is feasible using a Smart Irrigation System Using Arduino.

A smart irrigation system makes use of an Arduino-like computer and soil moisture sensors, as well as a water pump along with a few other basic components. The sensor determines the amount of water present in the soil. If it is dehydrated, the Arduino tells the pump to pump water. When the soil has sufficient moisture, the pump stops.

This project is an easy and engaging way for kids to get familiar with Arduino sensors, electronics programming, and plants, along with water conservation.

In this easy-to-follow guide, we will be able to understand the concept of what a smart irrigation system is, why it is useful, how it works, its benefits, required components, and how students can build an automatic plant watering system using Arduino


Author: Himanshu ( Content Writer)

TABLE OF CONTENTS
1.What Is a Smart Irrigation System Using Arduino?
2.Why Is Smart Irrigation Important? 
3.How Does an Automatic Plant Watering System Using Arduino Work? 
4.What Components Are Needed for an Automatic Irrigation System Project?
5.How to Make an Automatic Plant Watering System Project?
6.What Are the Benefits of a Smart Irrigation System Project?
7.What Do Students Learn From This Project?
8.How Can Schools Use This Project?
9.How Can You Improve the Project?
10.Student Testimonials
11.Final Thoughts: 
12.Frequently Asked Questions: 
Home » Blogs & Highlights

What Is a Smart Irrigation System Using Arduino?

A Smart Irrigation System Using Arduino is an automated system that waters plants according to the moisture content of the soil.

The system utilises a soil moisture gauge to determine whether the soil is damp or dry. The sensor transmits this info to the Arduino board. Arduino is then able to make an easy choice.

  • When the ground is not moist, the water pump is turned on.
  • If the soil is sufficiently moist, the water pump is turned off.

This is different from regular watering, in which one has to be aware of when to water the plants.

For students, it is an excellent illustration to show the ways that sensor technology and programming could solve problems in real life.

Why Is Smart Irrigation Important? 

They require water in order to grow; however, providing them with too much or insufficient water can result in issues.

If we do not water our plants, they could become too dry. In contrast, a plant that is given excessive amounts of water could waste water and harm the plant.

An intelligent irrigation system aids in solving this problem by providing water only to the soil when it is needed.

It could be helpful in:

  • Home gardens
  • School gardens
  • Small farms
  • Greenhouses
  • Terrace gardens
  • Plant nurseries
  • Science exhibits
  • Robotics and STEM labs

For students, the project provides a valuable concept: technology can be employed to conserve natural resources.

How Does an Automatic Plant Watering System Using Arduino Work? 

The operation of an Automatic Plant Watering System Using Arduino is simple to comprehend.

The soil moisture sensor is located inside the soil. It determines the amount of moisture within the plant’s roots.

When the soil gets wet, the sensors relay data to Arduino. Arduino analyses the information and triggers a relay. The relay functions as an electronic switch that activates the power source, which is the water pump.

The pump collects water from a tank and transmits it to the plant using small pipes.

If the soil is saturated, the sensor will detect the shift. Arduino will then turn the pump off.

Simple Working Process

Soil becomes dry. The sensor detects dryness. Arduino detects the signal, and the pump is turned ON. The plant is flooded – soil is wet. Arduino switches off the pump.

This easy process shows what the inputs, decisions, and output functions are in a computer system.

What Components Are Needed for an Automatic Irrigation System Project?

Students do not require sophisticated equipment to create the basic Automated Irrigation System Project.

The principal elements are:

1. Arduino Board

Arduino is the central part that runs the entire project. It receives data from the sensor and also controls the power source, which is the water pump.

2. Soil Moisture Sensor

This sensor is used to determine if the soil is wet or dry. It transmits the moisture data to an Arduino.

3. Water Pump

The pump transports water from a container into the plant.

4. Relay Module

Relays function as an electrical switch. It aids the Arduino in controlling the flow of water.

5. Water Container

A small container could be used to hold water in a container.

6. Connecting Wires

Jumper wires are used to connect various components.

7. Tubing or Small Pipe

The pipe transports water to and from the.

8. Power Supply

The Arduino and the other components require a power source.

Students may also include an LED or display, buzzer, or any other sensor to enhance the quality of the project.

How to Make an Automatic Plant Watering System Project? 

Automatic Plant watering System Project​

A simple Automated Plant Watering System project can be developed in a couple of easy steps.

Step 1: Prepare the Soil and Plant

Choose a small plant and put it in an earthen pot. Be sure that the soil is easily accessible to the moisture sensors.

Step 2: Place the Moisture Sensor

Place the soil moisture sensor into the soil around the plant’s root. It must be placed in a proper position so that it can detect variations in water.

Step 3: Connect the Arduino

Connect the sensor to the Arduino as per the circuit for the project. The sensor transmits data back to the Arduino.

Step 4: Connect the Relay and Pump

The relay is connected to an Arduino, and it utilises it to regulate the water pump.

Very Important! It is recommended that students work in conjunction with an adult or a teacher in connecting power and electrical components.

Step 5: Add the Water Pipe

Install an end of the pipe close to the plant, and attach the opposite end of the pipe to the pump.

Step 6: Upload the Arduino Program

Arduino requires a tiny program that tells it what it should do.

For instance:

If the soil is dry, turn off the pump.

If the soil is damp, turn off the pump.

Step 7: Test the System

Check the project’s performance by checking the readings of the sensors. If the soil is dry, the pumps must begin. Once enough water has reached the ground, the pump needs to stop.

This is the basic concept of an Automatic Plant Watering System.

What Are the Benefits of a Smart Irrigation System Project?

The Smart Irrigation System Project has many benefits for gardeners, students, and schools.

Saves Water

The system will provide water when the soil requires it, instead of watering plants excessively.

Saves Time

There is no need to manually inspect every plant constantly.

Helps Plants Get Regular Water

Plants may receive water if the soil is dry, and this can aid in healthy development.

Easy to Understand

Arduino-based projects are ideal for those who are new to programming because they can understand the work step-by-step.

Builds STEM Skills

Students will learn about engineering, science, technology, and math through a real-world project.

Improves Coding Skills

Students write basic directions for Arduino and discover how software controls hardware.

Encourages Problem-Solving

Students have to figure out solutions if the sensor, circuit, or pump isn’t working as it should.

What Do Students Learn From This Project?

An Automated irrigation system project isn’t just about watering plants. It could teach students a variety of important skills.

Students can be taught:

  • How sensors function
  • How does Arduino reads information? Arduino interprets data
  • Basic programming
  • Simple electronic circuits
  • How pumps function
  • Concepts of input and output
  • Problem-solving
  • Conservation of water
  • Basic automation
  • Technology that is applied in real-world situations

It is perfect as a tool for STEM education as well as robots in classes, science fairs and school labs.

What Is the Difference Between Normal Irrigation and Smart Irrigation?

Normal irrigation generally depends on a single person to decide when they should water plants.

Smart irrigation utilises sensors’ data to determine the best option.

Normal IrrigationSmart Irrigation
Usually, manual control is required.Does it work automatically?
The person decides when to water.The sensor provides soil information.
It is possible that watering has been forgotten.The system can react to soil that is dry.
More manual workMuch less manual work
Limited automationUtilises sensors and Arduino

The basic idea is that smart irrigation uses technology to make irrigation more efficient and automated.

How Can Schools Use This Project?

Schools can utilise an Automatic Plant Watering System Using Arduino as an activity in STEM that is practical.

Teachers could have students build the garden of their dreams that they can connect to an Arduino system. Students will then be able to examine what happens to the soil when it is wet and when water is added.

The project may be complemented by lessons on:

  • Plants
  • Conservation of water
  • Electronics
  • Coding
  • Robotics
  • Automation
  • Environmental protection

Techradiance, these hands-on projects will help students comprehend concepts by creating and testing real-world models instead of simply studying them.

How Can You Improve the Project?

Once they have mastered the fundamental task, they can then expand the options.

For instance, they may include:

  • LCD display
  • Water-level sensor
  • Sensor for temperature
  • Sensor for rain
  • Multiple soil moisture sensors
  • Mobile monitoring
  • Solar power
  • Automatic scheduling

A more sophisticated system could monitor different plants and regulate the amount of watering each plant independently.

This demonstrates to students how a basic classroom project could be transformed into a bigger IoT and smart agriculture project.

Student Testimonials 

The testimonials below serve as examples of educational content. They should be replaced by verified student/customer feedback prior to publication.

Testimonial 1

Aarav, Class 6 Student

“Building this Arduino irrigation program helped me to understand sensors. I enjoyed watching the pump come on when the soil got dry.”

Testimonial 2

Ananya, Class 7 Student

“I thought that coding was a challenge; however, this project made it much easier to grasp. I discovered that Arduino can be used to control real objects.”

Testimonial 3

Rohan, Class 8 Student

“My favourite part was testing the humidity sensor. It was thrilling to see how the system could tell that the plant needed water.”

Testimonial 4

Meera, Class 7 Student

“This project showed me how technology can be used to conserve water. I was happy to build something that could be useful in real gardens.”

Final Thoughts: 

A Smart Irrigation System Using Arduino is a basic but effective project that teaches you how technology can help solve common issues.

Through the combination of an Arduino board, a soil moisture sensor relay, and a water pump, students can build an Automatic Plant Watering System that reacts to the conditions of the soil.

Additionally, it teaches students about electronic programming, sensors, automation, water conservation, and STEM in fun and practical ways.

If it’s used as an automatic irrigation system project as the school science model, or even as a robotics lab exercise, students are given the chance to learn by doing.

Schools looking to introduce students to Arduino and robotics programming, STEM and AI project ideas, and Techradiance will help you create interactive educational experiences to make the technology more accessible to understand and more enjoyable for children and students

Frequently Asked Questions: 

To build an intelligent irrigation system, connect a soil moisture sensor, a controller relay, and a water pump. The sensor can detect dry soil and inform the controller that it should turn on the pump. If the soil is moist, the pump shuts off.

Yes. You can make a smart irrigation system without Arduino by using other controllers such as ESP32, ESP8266, or a simple moisture-sensor-based circuit. In IoT applications, ESP32 is a popular option.

The sensor for soil water is the most important sensor that is used in a sophisticated irrigation system. It monitors the amount of moisture in the soil. It aids the system in determining which plants require water.

A basic smart irrigation system may cost between Rs. 500 and Rs. 22,000 based on the Arduino IoT board and sensors, pumps, and other parts. Advanced systems that have many sensors, as well as mobile surveillance, may be more expensive. 

Yes, school children can design an automatic plant watering system under the guidance of an adult or teacher. It’s a fantastic STEM project to learn about sensors, Arduino, and coding, as well as electronics, along with water conservation.