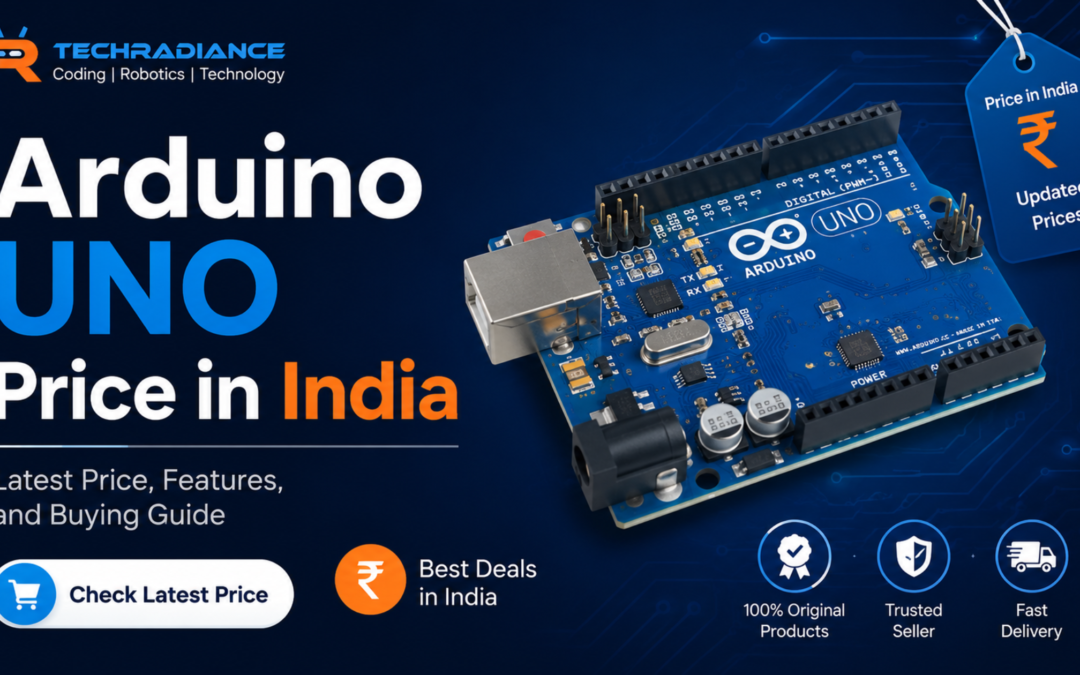
The Arduino UNO price in India ranges from Rs500 to Rs1,500, depending on whether you purchase an original board or a compatible clone. If you’re looking for an Arduino board that is reliable, high-quality, and can be used to learn robotics, coding, and IoT as well as electronics, Techradiance offers the Arduino Uno at Rs859. This makes it a great choice for beginners, students, and hobbyists.
The Arduino UNO, a beginner-friendly microcontroller board, is a great choice for anyone who wants to learn how to program, build a robot, or create a smart project.
Selecting the right board will depend on your purpose.
Step 2: Check Specifications
Verify:
ATmega328P Microcontroller
USB Connectivity
Pins in both digital and analog formats
Power Input Options
Compare prices
Compare prices before an Arduino UNO purchase from a trusted supplier.
Step 4: Select a Reliable Seller
Trusted sellers ensure:
Good quality
Fast delivery
Support for technical support
Genuine Products
Arduino Board Price Comparison
The Arduino UNO is often compared to other boards by beginners.
Here’s a quick comparison between the Arduino BoardsPrice ranges.
Arduino Board
Estimated Price
Arduino Nano
Rs400 – Rs900
Arduino UNO
Rs500 – Rs1,500
Arduino Mega
Rs 900 – Rs 2,500
Arduino Leonardo
Rs700 – Rs1,800
Arduino Due
Rs2,000 – Rs4,000
Arduino UNO is the most popular option because of its affordability, features, and ease of use.
Arduino UNO Kit Price: Is It Worth Buying?
The Arduino Uno kit price is often searched by buyers because the starter kits come with additional learning materials.
A typical Arduino starter package may include:
Arduino UNO Board
Breadboard
LEDs
Sensors
Jumper Wires
Servo Motor
LCD Display
The Benefits of Buying A Kit
All-in-One Package
Easier learning experience
It is better for beginners and schools
Robotics projects can be a good fit for this product
The Arduino UNO Kit price starts at around Rs 1,200, but can reach Rs 5,000 or more depending on the included components.
How to Identify the Arduino UNO Original Price?
To avoid buying inferior products, many buyers look for the Arduino UNO Original Price
Here are some helpful tips:
Check the product packaging.
Original boards are packaged in quality packaging and feature official branding.
Verify the seller’s reputation
Buy only from reputable educational suppliers.
Check out customer reviews.
Reviews can help identify genuine products.
Compare Specifications
Verify that the board meets official Arduino standards.
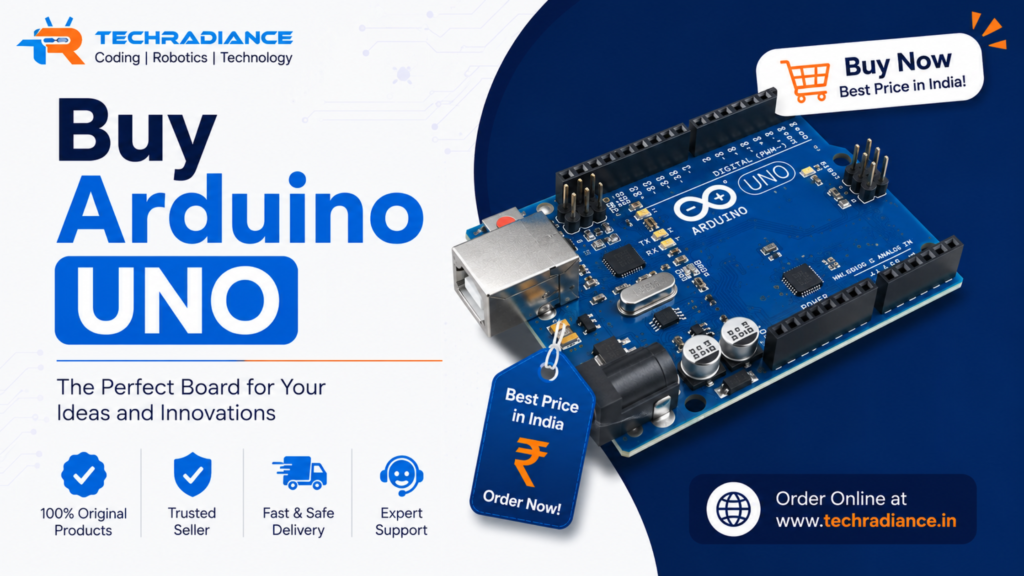
Why Choose TechRadiance for Arduino UNO?
Quality is important when purchasing an Arduino board.
TechRadiance is a name that has gained trust amongst schools, students, and educators.
TechRadiance: Benefits of buying from us
Priced Right
The Arduino UNO is available at Rs. 859.
Quality Assurance
Tested for reliability and educational use.
Ideal for Students
The perfect starter kit for robotics and coding.
Expertise in STEM and robotics
TechRadiance is a leader in STEM education, robotics, AI, and coding.
Support for Education
Ideal for schools, makerspaces, and innovation centres, as well as robotics laboratories.
What Our Customers Say
⭐⭐⭐⭐⭐ Arduino Projects at a Great Value
TechRadiance was the site I found when I searched for the lowest Arduino UNO prices in India. The board arrived quickly and was perfect for my robotics projects. “Great quality and reliable support.”
— Rahul Sharma, Engineering Student
⭐⭐⭐⭐⭐ A Genuine and Affordable Product
The Arduino UNO costs on TechRadiance, which is very affordable compared to other sites. The board is genuine, easy to set up, and perfect for beginners to learn electronics and coding.”
— Priya Verma, STEM Educator
⭐⭐⭐⭐ Where to buy Arduino UNO?
TechRadiance offers a quality Buy Arduino UNO without compromising on price. The product arrived in good condition and was able to help me finish my IoT Project successfully.
— Ankit Gupta, Electronics Hobbyist
⭐⭐⭐⭐⭐ Robotics is a great way to learn.
“I checked several websites before comparing the Arduino UNO Price in India on TechRadiance. The board was of excellent quality and performed perfectly in our robotics lab. Highly recommended.”
— Neha Kapoor, Robotics Trainer
TechRadiance offers an Arduino UNO Board for around Rs859 under its robotics section. This makes it a great option for students, educators, and hobbyists.
Final Thoughts:
The Arduino UNO Price in India depends on the quality, authenticity, and included accessories. Arduino UNO is a great investment for students, schools, and hobbyists. It allows them to learn electronics, coding, and robotics.
You must choose a supplier who offers reliability, quality, and educational value.
TechRadiance is offering a high-quality Arduino UNO for just Rs859. This makes it a great choice for educators, robotics enthusiasts, and innovation labs.
The Arduino Uno can help you turn your ideas into reality, whether you’re building your first robot or embarking on a STEM learning journey.
Author: Himanshu ( Content writer)
Frequently Asked Questions:
1. Is Arduino Nano or Uno better?
The Arduino UNO has a better user interface and is easier to troubleshoot.The Arduino Nano works better for compact projects with limited space. Your project’s requirements will determine the best option.
2. Which is the cheapest Arduino board?
The Arduino Nano can be one of the most affordable Arduino boards in India. Compatible Nano boards can be purchased at lower prices than other Arduino models.
3. What are the disadvantages of the Arduino Nano?
The Arduino Nano is smaller, making wiring for beginners more challenging. It is also missing a standard DC power connector, and learning may be more difficult than with the Arduino UNO.
4. Is Arduino Nano cheaper than Arduino Uno?
In most cases, Arduino Nano will be cheaper than Arduino Uno. Nano’s smaller dimensions and simpler design result in lower prices.
5. Is Arduino a type of microcontroller?
No, Arduino does not contain a microcontroller. Arduino is a board for project development that includes a microcontroller (such as the ATmega328P) and other components to make programming easier.
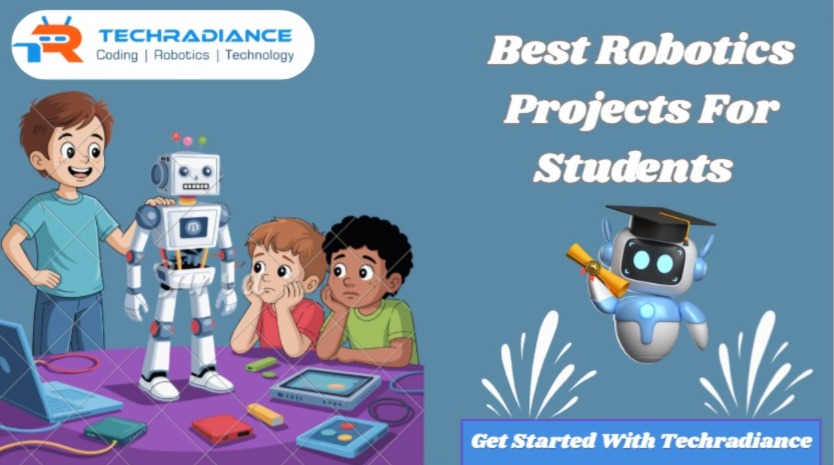
Robotics Projects for Students teach children about the basics of coding, electronics, problem-solving and imagination through hands-on exercises. The 2026 edition of popular projects will include line-following robotics, obstacle-avoiding robots and smart irrigation systems with AI-powered robots. These projects can make STEM learning enjoyable and help prepare students for careers in engineering, technology and artificial intelligence. For the beginner, simple Robotics Project Ideas For Beginners, such as smart dustbins and Bluetooth-controlled robot vehicles are fantastic starting places. Parents and schools can investigate “How To Make A Robot For Kids” using beginner-friendly robotics kits, sensors, and Arduino-based platforms.
Robotics Projects for Students are activities that involve hands-on work where students design, program, and test robots in order to solve real-world issues. These projects allow students to learn science, engineering, technology and mathematics (STEM) engagingly and practically.
By 2026, robots will become a crucial ability for students in India. Schools are offering robotics labs, coding classes and AI-based learning programmes that prepare students for their future careers.
If you’re a novice or a more advanced student, robotics projects can help increase your creativity, problem-solving abilities and technical skills.
🌟 Why Are Robotics Projects Important For Students?
Robotics goes far beyond creating machines.
Below are a few advantages:
✅ Increases creativity
✅ Develops problem-solving abilities
✅ Encourages collaboration
✅ Makes learning fun
✅ Builds coding skills
✅ Preparing students for their future careers
✅ Improves confidence
✅ Instructs students to think critically and innovatively
Students working on robotics projects are taught by doing, rather than simply reading books.
🎯 Top Benefits Of Robotics Learning In 2026
🧠 Better Problem-Solving Skills
Students face difficulties while creating robots. They are taught to spot issues and then find solutions.
💡 Boosts Creativity
Robotics lets students create new ideas and come up with innovative solutions.
💻 Improves Coding Skills
A lot of robotics projects need simple code. Students can learn to code while having fun.
🤝 Encourages Teamwork
The majority of robotics competitions require students to collaborate and share their ideas.
🚀 Prepares Students For Future Careers
Industries such as AI automation, manufacturing and healthcare utilise robots in large amounts.
🔥 15 Best Robotics Projects For Students In 2026
1 Line Following Robot
The line-following robot is able to move by following a black line on the floor.
What Students Learn
✅ Sensors
✅ Programming
✅ Automation
Difficulty Level
⭐ Beginner
2 Obstacle-Avoiding Robot
The robot can detect obstacles and automatically change direction.
What Students Learn
✅ Ultrasonic sensors
✅ Robotic motion
✅ Distance measurement
Difficulty Level
⭐ Beginner
The most well-known Robotics Project Ideas For Beginners.
3 Smart Street Light System
The lights will automatically turn on at night and turn off during the daytime.
What Students Learn
✅ Light sensors
✅ Energy savings
✅ Smart urban concepts
Difficulty Level
⭐ Beginner
4 Automatic Plant Watering Robot
The robot monitors soil moisture and water levels and also waters plants whenever required.
What Students Learn
✅ Smart farming
✅ Environmental monitoring
✅ Automation
Difficulty Level
⭐ Intermediate
5 Bluetooth-Controlled Robot Cars
Students are able to control the robot via smartphones.
What Students Learn
✅ Wireless communication
✅ Mobile app integration
✅ Robot control systems
Difficulty Level
⭐ Intermediate
6 Smart Dustbin Robots
The lid for the dustbin is automatically opened when someone walks in.
What Students Learn
✅ Sensors
✅ Automation
✅ Smart waste management
Difficulty Level
⭐ Beginner
7. Robotic Arm
Robot arms can be used to pick up and place objects.
What Students Learn
✅ Mechanical design
✅ Motors with servos
✅ Industrial robotics
Difficulty Level
⭐⭐⭐ Advanced
8 Voice-Controlled Robot
Students can use voice commands to manage the robot.
What Students Learn
✅ Speech recognition
✅ AI fundamentals
✅ Smart technology
Difficulty Level
⭐⭐⭐ Advanced
9 Smart Home Automation Robots
Control the lights, fans and appliances using a robotic system.
What Students Learn
✅ IoT
✅ Home automation
✅ Wireless technology
Difficulty Level
⭐⭐⭐ Advanced
10 Fire Fighting Robot
This robot can detect and eliminate small flames.
What Students Learn
✅ Security systems
✅ Sensors
✅ Technology for emergency response
Difficulty Level
⭐⭐⭐ Advanced
11. Solar-Powered Robot
The robot operates on solar energy.
What Students Learn
✅ Renewable energy
✅ Green technology
✅ Efficiency in energy use
Difficulty Level
⭐⭐ Intermediate
12 Smart Traffic Management Robots
This project handles traffic signals on a computer.
What Students Learn
✅ Smart urban concepts
✅ Traffic control systems for traffic control
✅ Automation
Difficulty Level
⭐⭐⭐ Advanced
13 Gesture-Controlled Robot
They control robots with hand movements.
What Students Learn
✅ Motion sensors
✅ Human-machine interaction
✅ Wireless communication
Difficulty Level
⭐⭐⭐ Advanced
14 Delivery Robot
A machine that moves small objects from one location to another.
What Students Learn
✅ Logistics automation
✅ Route plan
✅ Navigation by robots
Difficulty Level
⭐⭐⭐ Advanced
15 AI-Powered Robot Assistants
A robot with intelligence that can respond to questions and requests.
What Students Learn
✅ Artificial Intelligence
✅ Machine Learning Basics
✅ Future Technology
Difficulty Level
⭐⭐⭐⭐ Expert
🎓 Best Robotics Project Ideas For Beginners
If you’re just beginning your robotics adventure, these projects are the perfect choice:
🔹 Line Following Robot
🔹 Smart Dustbin
🔹 Obstacle-Avoiding Robot
🔹 Smart Street Light
🔹 Automatic Plant Watering System
🔹 Bluetooth Robot Car
These Robotics Project Ideas For Beginners are easy to construct and only require the most basic of components.
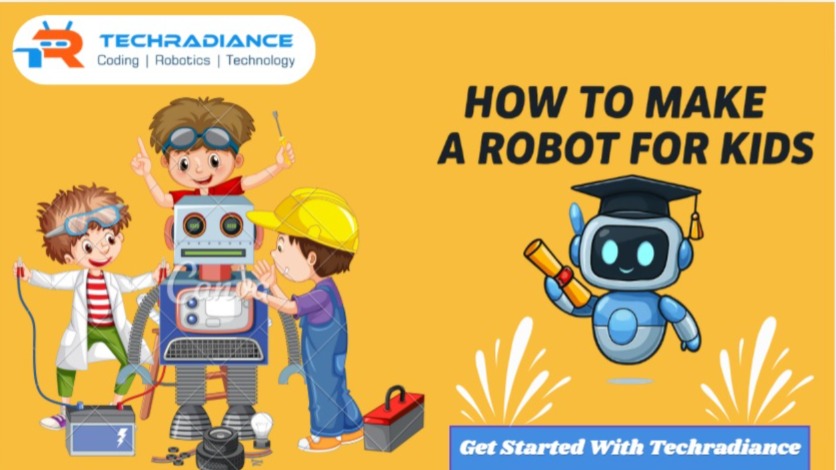
🤔 How To Make A Robot For Kids?
Many teachers and parents are asking, “How To Make A Robot For Kids?”
The good news is that building simple robots is simpler than ever before.
Step 1: Choose a Simple Project
Start by:
✅ Line-Following Robot
✅ Obstacle-Avoiding Robot
✅ Smart Dustbin
Step 2: Gather Components
You may need:
🔹 Arduino Nano
🔹 Motors
🔹 Wheels
🔹 Sensors
🔹 Battery
🔹 Jumper Wires
Step 3: Build The Robot
Connect the components in accordance with the plan design.
Step 4: Upload The Code
Utilise Arduino programming for a simple way to guide the robot.
Step 5: Test And Improve
The robot should be run, and modifications should be made if required.
🏆 Robotics Competitions Students Can Join In India
Competitions in robotics allow students to showcase their talents.
The most popular competitions are:
🏅 FIRST Robotics Competition
🏅 World Robot Olympiad (WRO)
🏅 TechRadiance Robotics Championship
🏅 ATL Marathon
🏅 National Robotics Challenge
🏅 School-Level Robotics Competitions
These activities help students build confidence and gain practical knowledge.
📚 Skills Students Learn Through Robotics
Students develop many important skills:
🔧 Technical Skills
Coding
Electronics
Sensors
Circuit Design
🧠 Thinking Skills
Problem Solving
Logical Reasoning
Critical Thinking
🤝 Soft Skills
Communication
Leadership
Teamwork
Creativity
🌍 Future Of Robotics In India
India is rapidly evolving into a nation driven by technology.
Industries like:
✅ Healthcare
✅ Manufacturing
✅ Agriculture
✅ Space Research
✅ Defense
✅ Education
Robotics solutions are being adopted by many.
According to experts in the field, experts in robotics, AI, and automation will lead to millions of jobs.
Students who learn robotics today will be in a position to gain a significant advantage in the future.
⭐ Why Schools Are Adding Robotics Labs
Modern schools are beginning to introduce robotics labs because they:
✅ Increase STEM-related learning
✅ Create more interactive classes
✅ Encourage creativity
✅ Preparing students for their future careers
✅ Engage students more
Robotics labs enable students to gain experience in the classroom instead of just learning theoretical knowledge.
📊 Difference Between Beginner and Advanced Robotics Projects
Feature
Beginner Projects
Advanced Projects
Complexity
Simple to construct
More complex design and programming
Components
Motors and sensors that are basic
AI-based modules, IoT gadgets, advanced sensors and IoT
Coding Level
Basic programming
Advanced to intermediate programming
Examples
Smart Dustbin, Line-Following Robot
Robotic Arm, AI Assistant Robot
Learning Focus
The fundamentals of robotics
Automation AI, automation, and real-world applications
For the beginner, Robotics Project Ideas For Beginners, such as obstacle-avoiding robotics and Bluetooth-controlled cars, are perfect. Students who are wondering How To Make A Robot For Kids can begin by using Arduino-based kits that provide easy assembly and programming, which makes robotics enjoyable and simple to master.
💬 Student Testimonial
⭐⭐⭐⭐⭐
Before entering the robotics course, I was apprehensive about programming. After I created my first obstacle-avoiding robot, I gained confidence and began taking part in robotics competitions. In the future, I would like to be an engineer in robotics.”
– Aarav Sharma, Grade 8 Student
🏢 Why Choose TechRadiance for Robotics Education?
TechRadiance is a company that provides tech solutions.We support students and schools in learning about robotics by implementing projects that are practical and applications that are real-world.
🌟 What We Offer
✅ Robotics Lab Setup
✅ STEM Education Programs
✅ AI & Coding Workshops
✅ Arduino-Based Projects
✅ Robotics Competitions
✅ Teacher Training Programs
✅ Future-Ready Learning Solutions
Our mission is to assist students in becoming creators, innovators and future technology leaders.
🎯 Conclusion
Robotics Projects for Students are among the most effective ways to study the latest technology of 2026. They can make learning enjoyable, engaging, fun, and practical. From simple line-following robots to advanced AI-powered assistants that can be programmed, robotics can open the doors to new possibilities and careers in the future.
You may be seeking Robotics Project Idea, or you are looking for Robotics Project Ideas For Beginners, or you are pondering How To Make A Robot For Kids. The right project will spark creativity and develop important abilities.
With the guidance of TechRadiance, students across India can explore robotics programming, AI, and automation while preparing themselves for the careers of the future. 🚀🤖
❓ FAQ
Q1. What are Robotics Projects for Students?
Ans: Robotic Projects for students are educational projects where students create, construct, and program robots to solve specific challenges while learning STEM abilities.
Q2. Which robotics project is best for beginners?
Ans: The most effective beginner projects are robots that follow lines and obstacle-avoiding robots, as well as smart dustbins and smart street lighting systems.
Q3. Why should students learn robotics?
Ans: Robotics can help students develop their ability to code, creativity and teamwork, as well as critical thinking and problem-solving skills.
Q4. How To Make A Robot For Kids?
Ans: Begin with a basic robotics kit. Use simple components like Arduino Nano as well as sensors. Follow the project’s instructions and then test the robot step-by-step.
Q5. What are the best Robotics Project Ideas For Beginners?
Ans: The most popular beginner projects are the following:
Line Following Robot
Smart Dustbin
Obstacle-Avoiding Robot
Bluetooth Robot Car
Automatic Plant Watering System
Q6. Can schools set up robotics labs?
Ans: Yes, schools can create robotics labs that include robotics kits, programming tools, sensors and project-based learning programmes for students to gain real-world STEM experiences.
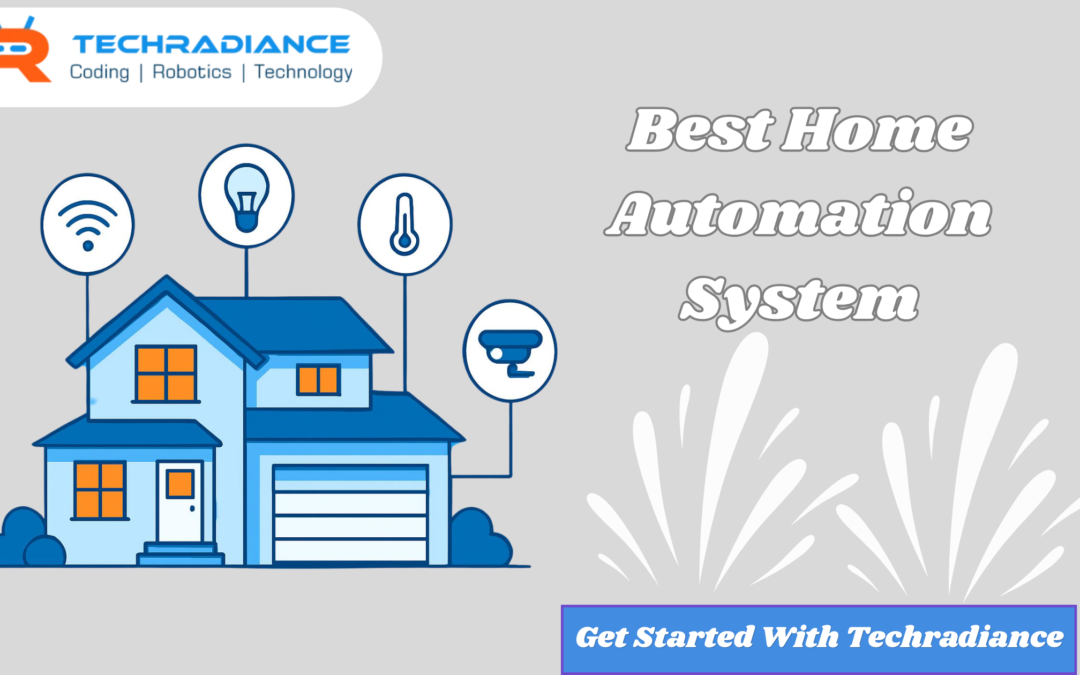
In today’s fast-paced world, homeowners want homes that are intelligent, secure, safe, and simple to control. The best home automation system allows you to control lights and fans, cameras, doors, ACs, and many more devices with your mobile phone or voice commands. Modern families prefer smart homes due to the fact that they can make life easier and enhance the security of their homes, as well as make living more enjoyable.
At TechRadiance, we help homes get smarter by providing contemporary and simple-to-use automation systems. A reliable home automation system is not only beneficial for luxury homes but also for regular houses, apartments, and offices.
A home automation system is a technologically advanced setup that connects all the devices in a home. It lets users control electrical appliances automatically or remotely.
For instance:
💡 Switch lights on/off by calling a mobile phone
❄️ Control AC temperature via remote
🔐 Digitally lock and unlock doors.
📷 View security cameras live
🎙️ You can use voice commands with Alexa as well as Google Assistant
A modern smart home automation system simplifies life and makes it more secure for families.
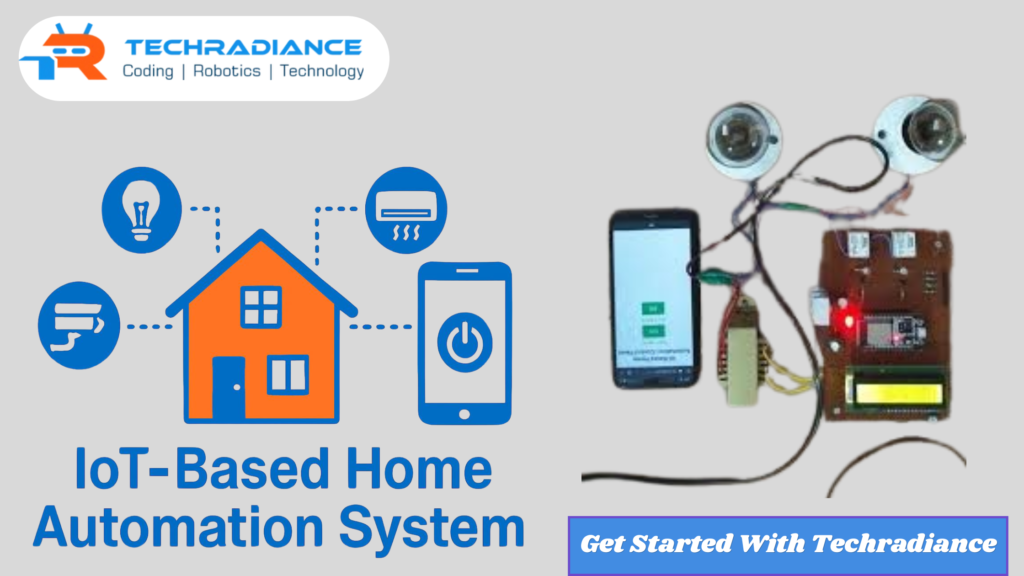
🌐 What Is an IoT-Based Home Automation System?
An IoT-based home automation system uses the Internet of Things (IoT) to connect smart devices over the internet.
That means that your devices will communicate with each other and perform their tasks in a way that is automatic.
Example:
The lights automatically come on the moment you enter a space
Smart curtains close during strong sunlight
Security cameras alert your mobile
An IoT-based home automation system helps homeowners manage everything from any place around the globe.
⚙️ How Does a Smart Home Automation System Work?
The Smart Home Automation System is a system that works by the following means:
📱 Mobile applications
🌐 Internet connection
🎤 Voice assistants
🔌 Smart sensors and controllers
This system connects the entire range of smartphones to one network. Users can control devices with applications as well as voice commands.
Simple Working Process:
Sensors can collect data
Data is passed to the smart controller.
The controller transmits commands
Devices can perform actions automatically
This can make homes smarter and more efficient.
❓ Why Are Modern Homes Using Home Automation Systems?
Modern homes use automation, as it enhances the quality of life.
Main Reasons:
🛡️ Better home security
⚡ Energy saving
🕒 Saves time
😊 More comfort
📱 Easy remote access
👨👩👧 Better family safety
The best home automation system helps families easily manage their homes even when they’re outdoors.
🧠 Home Automation System Comes Under Which Technology?
Many people enquire, “Does a home automation system comes under which technological system?”
Home automation systems are categorised as follows: home automation system for homes generally fall into the following categories:
🌐 Internet of Things (IoT)
🤖 Artificial Intelligence (AI)
📡 Wireless Communication
🏡 Smart Home Technology
These technologies are used to create smart and connected homes.
🏡 Benefits of the Best Home Automation System
🔐 1. Better Security
Digital locks, smart cameras and motion sensors enhance the security of your home.
⚡ 2. Energy Saving
The devices automatically shut off when they are not in use.
📱 3. Remote Access
Users can manage devices from any location by using their smartphones.
😊 4. Comfort and Convenience
Automation and voice control help with everyday tasks.
👨👩👧 5. Family Safety
Smoke detectors and intelligent alerts ensure the safety of family members.
💰 6. Cost Savings
A lower electricity consumption can reduce monthly costs.
🔄 Difference Between Traditional Homes and Smart Homes
Feature
Traditional Home
Smart Home Automation System
Device Control
Manual
Automatic & Remote
Security
Basic Locks
Smart Security Systems
Energy Use
High
Energy-efficient
Convenience
Limited
Very High
Monitoring
Difficult
Easy Mobile Monitoring
An intelligent home automation offers more control and peace of mind when compared to traditional dwellings.
Engineers and students also design a smart home automation system project to understand IoT and automation technology.
📲 Features of the Best Home Automation System
⭐ Important Features:
Smart lighting control
Smart door locks
Monitoring CCTV
Voice assistant support
Smart temperature control
Motion sensors
Mobile app access
Energy monitoring
These modern features make homes more user-friendly and intelligent.
🧩 How to Choose the Best Home Automation System?
The choice of the best system is essential.
Consider These Things:
✅ Easy mobile control
✅ Secure features with strong security
✅ Good customer support
✅ Options to save energy
✅ Voice assistant compatibility
✅ affordable Price
The best home automation system should be easy, secure, and solid.
🚀 Why Choose TechRadiance for Smart Home Solutions?
TechRadiance is a reliable and sophisticated smart home solution designed for modern families.
Why Customers Trust TechRadiance:
✔️ Modern IoT technology
✔️ Easy installation
✔️ User-friendly systems
✔️ Affordable smart solutions
✔️ Expert technical support
✔️ High-quality automation devices
We help our customers design safer, more intelligent, and more comfortable homes.
💬 Real Customer Testimonials
⭐⭐⭐⭐⭐ Rohit Sharma, Delhi TechRadiance has installed an intelligent home system in my home. I can now control lighting and cameras with my smartphone extremely quickly.”
⭐⭐⭐⭐⭐ Neha Verma Noida “The security features of the system are incredible. I feel more secure with the smart home automation system.”
⭐⭐⭐⭐⭐ Amit Singh, Gurgaon “The method is easy and operates flawlessly. My electricity costs are also lower.”
📈 Why Home Automation Is the Future
Smart homes are getting more and more popular each year. Customers want greater security and comfort as well as energy efficiency.
The future of homes could include:
🤖 AI-powered automation
🌐 Faster IoT connectivity
🔋 More energy-efficient devices
🗣️ Better voice control systems
The need to find one of the best home automation system will continue to grow in modern cities and smart homes.
✅ Conclusion
The best home automation system helps make homes safer, smarter, and more enjoyable. In everything from security cameras to lights that can be controlled by voice automation, you can enhance your life in numerous ways.
A modernIoT-based home automation system saves energy, provides greater security, and offers complete control over phones or voice assistants.
If you’re looking to improve your living space with the latest technological advancements, TechRadiance can help you create the perfect smart home system for your requirements.
❓ FAQs
Q.1 What is the best home automation system?
Ans: The most efficient house automation solution is a system that manages lights and appliances, security, and many other gadgets in real-time or remotely.
Q.2 How does an IoT-based home automation system work?
Ans: It connects smart devices to the internet and lets users control them with apps on their phones as well as voice assistants.
Q.3 Is a smart home automation system expensive?
Ans: Yes, a variety of affordable smart home options are available to suit different budgets.
Q.4 What are the benefits of home automation?
Ans: Home automation enhances security, conserves energy, improves comfort, and allows access to devices via remote.
Q.5 The home automation system comes under which technology?
Ans: It’s mostly IoT, artificial intelligence, and smart home technology.
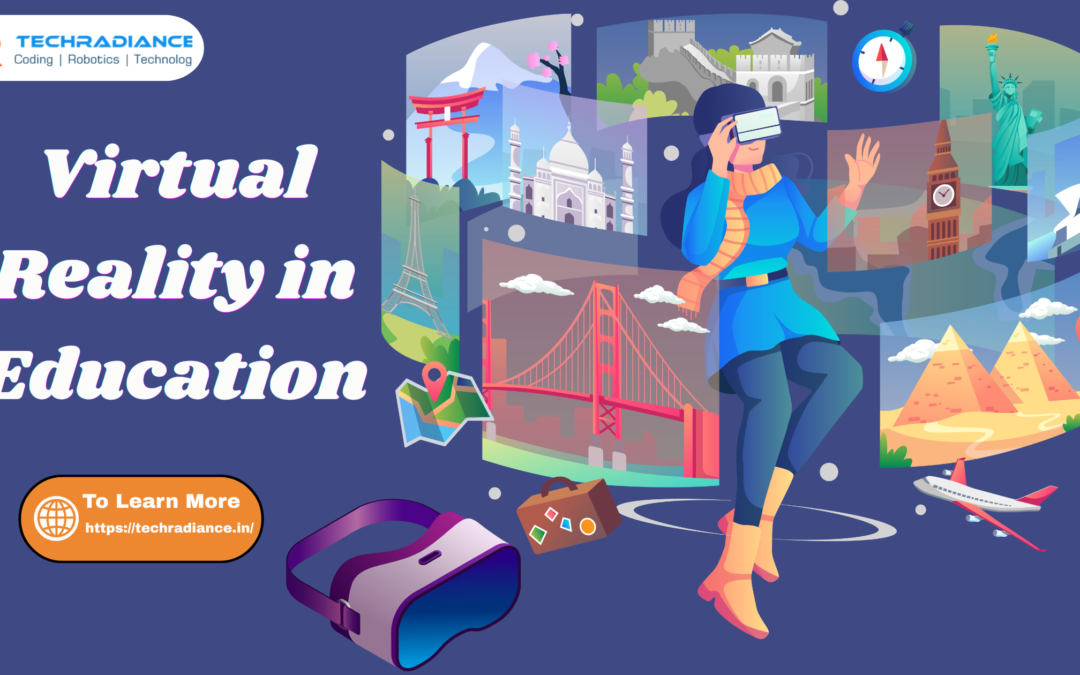
Technology is revolutionising the way students learn in school. In 2026, a lot of schools will be using intelligent learning tools that help make learning more enjoyable and engaging. One of the biggest shifts is the introduction of Virtual Reality in Education. Students no longer learn solely from blackboards and books. Today, they can explore planets, go to historical locations, and conduct scientific experiments with virtual worlds.
Techradiance can help schools bring innovative learning tools to classrooms using the latest VR technology and smart technology for education.
In this blog, we’ll learn about virtual reality and how it is used in schools, the reasons why schools use it, and the numerous advantages it can bring to teachers and students.
Virtual reality is a computer-generated 3D space where students can explore as well as interact with objects by using VR headphones and smartphones.
When we speak of Virtual Reality in Education, it refers to using VR technology to enhance the learning process in colleges, schools, and training facilities.
For example:
Students can go to ancient Egypt without having to leave the classroom.
Biology students can look at the human body 3D.
Geography students can study mountains, volcanoes, and rivers virtually.
Students in science can conduct experiments without risk in a virtual lab.
This makes learning more enjoyable and easy to comprehend.
Why are Schools Using Virtual Reality in 2026?
In 2026, schools want students to be able to learn with a better and more concrete method. Traditional learning methods can be useful; however, the majority of students learn better by being able to observe and feel things.
This is the reason why schools are utilising VR technology.
Here are a few important reasons to consider:
1. Better Student Engagement
Students love interactive learning more than reading long books. VR classes make learning engaging and enjoyable.
2. Easy Understanding of Difficult Topics
Certain topics, such as space, human anatomy, and science experiments, are difficult to visualise. Virtual reality can help students understand how these ideas are clear.
3. Safe Learning Environment
Students can take part in risky tasks safely in a virtual world. For instance, experiments in chemistry can be conducted with no real risk.
4. Improves Memory
Children are more aware of things when they experience and see them rather than only reading about them.
How Does Virtual Reality Work in Classrooms?
Schools employ VR headsets and smart screens, computers, as well as special educational software to provide immersive learning experiences.
Here’s the way it functions:
The teacher decides to choose the VR lesson.
Students are required to wear VR headsets.
The 3D virtual world is projected before them.
Students are free to play around and discover the lessons interactively.
For example, during a lesson on history students are able to explore ancient structures and gain a deeper understanding of history.
This approach to learning boosts the students’ interest.
Children are fascinated by learning through images and engaging activities. VR can be a great way to stimulate classrooms.
2. Improves Focus
Students pay greater concentration when they are in VR classes because they are connected to the learning.
3. Encourages Practical Learning
Instead of just reading the theory, students can actually practice concepts through virtual reality.
4. Helps Slow Learners
Students may require visual explanations for concepts. VR helps them learn more easily. students who need visual explanations.
5. Boosts Creativity
Virtual reality lets students explore their creative thinking and work on problems in a collaborative manner.
6. Better Collaboration
Students are able to collaborate on virtual projects and games.
7. Supports Modern Education
Schools that use VR technology offer advanced and future-proof education.
These are the major benefits of virtual reality for education, which are helping schools improve their learning in 2026.
What Subjects Can Use Virtual Reality?
Virtual reality is a tool that can be utilised in virtually every area.
Science
Students can discover the universe, atoms, and planets as well as humans in 3D.
Mathematics
Complex shapes and formulas are more comprehensible visually.
History
Students are able to explore ancient civilisations as well as historical monuments.
Geography
Children can go on adventures in deserts, oceans, forests, and even volcanoes.
English Learning
Students can enhance their speaking and communication skills through active learning.
Medical Training
Medical students and doctors use VR for practice in surgery as well as patient education.
What is Augmented Reality?
A lot of people are confused about VR and AR. Let’s look at the distinction between augmented reality and virtual reality.
Virtual Reality (VR)
VR creates a completely virtual world. Students wear headsets and are immersed in the virtual world.
Example: A student explores the solar system within an online classroom.
Augmented Reality (AR)
AR allows digital objects to be added to the real world with tablets, phones, or smart glasses.
Example: A 3D dinosaur appears on a table in a classroom using an app for mobile devices.
Augmented Reality vs Virtual Reality
Here’s a brief comparison of augmented reality and virtual reality.
Feature
Augmented Reality
Virtual Reality
Environment
Digital world in real time with objects
Virtually immersive world
Devices
Tablets or mobile phones
VR headsets
Experience
Partly fully
Full immersion
Usage
Interactive learning
Virtual experiences that are deep
Cost
Usually, the lower
Could be higher
Both of these technologies are beneficial in the classroom and help schools improve the learning experience of students.
How Virtual Reality in Education Helps Teachers
Virtual reality isn’t just beneficial for students. Teachers also benefit from it.
Easy Explanation of Topics
Teachers can explain difficult concepts more clearly using visuals.
Better Classroom Participation
Students become more active during lessons.
Saves Time
Complex demonstrations can be demonstrated quickly using VR simulations.
Improves Teaching Methods
Teachers can design innovative and modern classroom experiences.
What is Virtual Reality Training?
Virtual Reality Training uses VR technology to help students learn practical aspects of life safely and effectively.
Nowadays, a variety of industries utilise virtual reality in their training. This includes:
Medical training
Pilot training
Training for military personnel
Engineering education
Training in safety for the workplace
For example, medical students can practise surgeries in virtual simulations before performing the same procedures in real life.
This helps reduce mistakes and increases confidence.
Benefits of Virtual Reality Training for Students
Safe Practice
Students can learn new skills with no risk of harm.
Real-Life Experience
VR offers a realistic learning experience.
Better Skill Development
Students gain speedier results with the use of interactive exercises.
Confidence Building
The repetition of practice in virtual reality increases confidence.
Challenges of Virtual Reality in Education
While VR offers many advantages, there are a few issues too.
High Cost
VR equipment is expensive for some schools.
Internet and Technical Issues
Some schools might not have reliable internet or technical assistance.
Teacher Training
Teachers require proper training in order to utilise VR tools efficiently.
But technology is becoming accessible each year, and more and more schools are embracing VR solutions.
Why Virtual Reality is the Future of Education
The world of education is rapidly changing. Students today demand intelligent, interactive and practical learning techniques.
Virtual reality can help schools design future-ready classrooms that allow students to:
Learn faster
Get better at understanding
Stay engaged
Learn practical abilities
In the next few years, many schools across India and around the world will implement VR learning technologies.
How Techradiance is Helping Schools
Techradiance is a modern educational tool for schools, such as smart classrooms, VR labs, robotics labs, and innovative learning strategies.
The company supports schools:
Develop advanced VR labs
Enhance digital learning
Design smart classrooms
Enhance student engagement
Help with practical learning methods
Innovative educational solutions from the company help students prepare for their future.
Final Thoughts:
Virtual Reality in Education is transforming classrooms in 2026 by making learning more engaging, fun, and relevant. Students no longer have to stick to conventional methods of learning. They are now able to discover the world around them, carry out experiments, and grasp intricate topics with engaging experiences.
The benefits of virtual reality in the classroom are aiding students in developing their confidence, creativity, and problem-solving abilities. While at the same time, technologies like virtual reality vs augmented reality are opening up new opportunities for better learning.
With companies such as Techradiance that are promoting modern solutions for education, schools are moving towards a more exciting and innovative future.
What Schools and Students Say About Our VR Learning Solutions
“Students love learning using VR.”
“After the introduction of Virtual Reality learning in our classes, students became more engaged and enthusiastic in their lessons. Even complex science concepts are now simple to grasp. Thanks to Techradiance for bringing intelligent education to our schools.” — Principal, Delhi Public School
“Learning Has Become Fun and Interactive”
“Our students are enjoying playing in virtual worlds during class. The VR lab has increased students’ engagement and enthusiasm. Teachers are also finding it easier to communicate complex issues.” — School Coordinator, Gurugram
“Best Technology for Modern Classrooms”
“We were looking for future-ready classrooms to teach our students. The VR solutions offered by Techradiance have helped us reach this target. The process of installing was easy, and the tech support team was extremely helpful.” — Director, Smart Kids Academy
“Very Helpful for Practical Learning”
“Virtual real-world training provides students with the opportunity to experience real-world learning without risk. Students can grasp concepts more quickly when they learn using visuals.” — Science Teacher, Haryana
“Students Remember Lessons Better”
“Children are more engaged and focused when they are in VR sessions. They retain lessons for longer because they can see and feel what they are learning.” — Academic Head, CBSE School
Frequently Asked Questions ( FAQ’S)
1. What is the use of Virtual Reality in Education?
Virtual Reality in Education is utilized to make learning more fun, interactive and enjoyable. It aids students in understanding difficult concepts by using 3D images and virtual experiences.
2. Which VR is best for education?
The most effective VR for education is one that’s user-friendly as well as safe for students and that supports learning through interactive activities. Schools are increasingly using educational VR headsets that come with intelligent software for classrooms to provide better learning experiences.
3. What are Virtual Reality examples?
Common virtual reality examples include virtual science labs, 3D solar system tours, medical simulations, virtual museum tours, and exploring historical places.
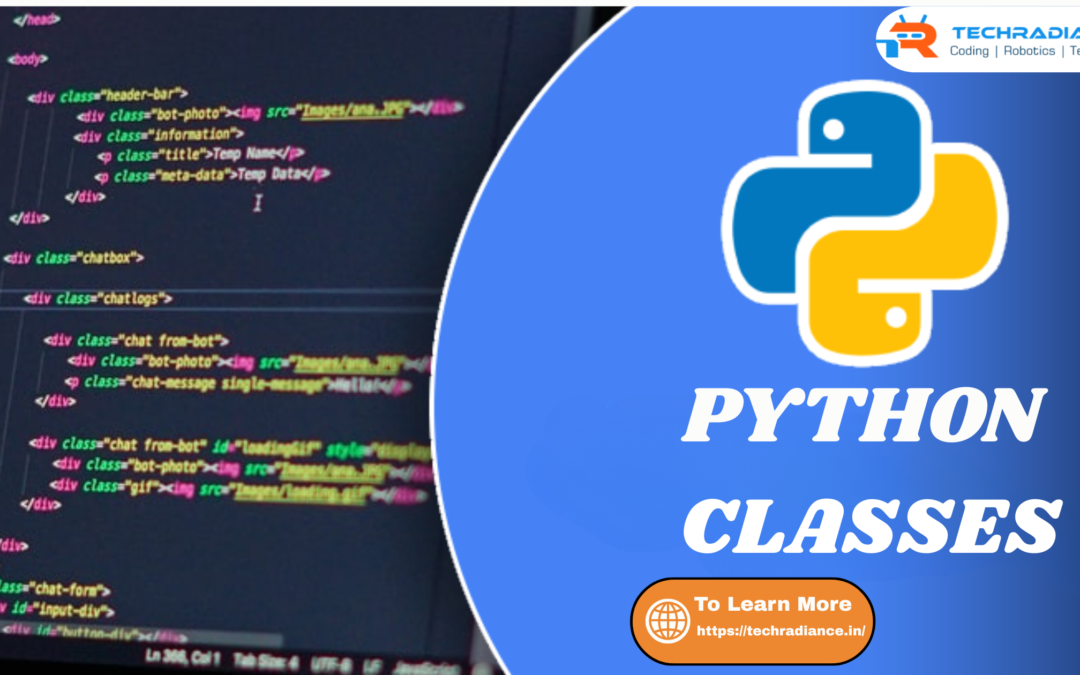
Nowadays, the world is changing rapidly to digital. Everything from mobile applications to websites, and even smart devices, is running with the coding. That’s why so many students are now enrolled in Python classes to begin their journey into coding.
Python is among the simplest programming languages. Even elementary school students can master it without any difficulty. If you’re thinking about your future, mastering Python could open the door to many job possibilities in India.
In this blog, we’ll thoroughly discuss everything: what Python is, how you can learn it, and what you can do once you’ve learned it.
Python classes are the classes where students learn to code in the Python language. The classes are intended for beginners, meaning that you do not require any prior experience.
The students are taught:
Basic concepts of coding
How can you solve problems using code
Smaller projects, such as calculators or games
Real-world applications
An example: A student can build a basic calculator with Python within a couple of lessons.
❓ Why Should Students Join Python Classes?
There are a variety of reasons why students should take Python classes:
Easy to Understand
Python appears like basic English. Students can therefore learn quickly.
High Career Demand
Numerous firms in India are in search of Python experts.
Builds Strong Thinking Skills
Coding allows students to think in a step-by-step manner and solve issues.
Useful in Many Fields
Python is utilised in:
Websites
Apps
Artificial Intelligence
Analysis of data
This is why Python is an excellent option for students.
🔍 Python Classes Near Me – How to Find the Right One?
Many students look for Python Classes Near Me for the most reputable school nearby.
But how do you decide the best one?
Here are some easy tips:
Make sure that classes are accessible to beginners.
Find out about practical learning (not only theorizing)
Ask for demo classes
Read student reviews
Example: If a course teaches using real-world projects, it is always superior to textbook learning.
💻 Python Coding Classes Near Me – What Will You Learn?
If you sign up for the Python Coding Classes Near Me it’s not just a chance to get a computer; you learn to think like a programming expert.
You will be taught:
Writing simple programs
Creating games
Small apps that are built
Understanding logic
An example: Students can make a game as simple as “Guess the number” with Python.
🧠 Python Programming Classes Near Me – Skills You Will Gain
These skills aid students in their schooling as well as in future career choices.
📚 Complete Python Course – What Does It Include?
A Complete Python Course includes everything you need from the basics to advanced topics.
It is usually comprised of:
Basics of Python
Loops and their conditions
Functions
Projects
An introduction to AI and data
Examples: By the conclusion of the course, students are able to design real-world projects such as a small web-based application or a website.
❓ How to Learn Python Easily?
Many students wonder, How to Learn Python Easily?
Here’s a step-by-step guide:
Step 1: Begin by learning the the basics
Learn basic concepts such as loops and variables.
Step 2: Practice Daily
Even 30 minutes daily can make a big difference.
Step 3: Work on Small Projects
Make simple things such as:
Calculator
Quiz game
Step 4: Join Python Classes
The benefits of having teachers as your teachers make learning simpler and quicker.
Example: A student who exercises regularly can master Python basics in only a couple of months.
🚀 Career Opportunities After Python Classes for Students in India
After having learnt Python, students are able to choose from various exciting professions:
Software Developer
They design and develop software and apps.
Examples: Apps like Instagram or WhatsApp are created by developers.
Data Analyst
They make use of data and aid companies in making decisions.
AI Engineer
They design smart machines, such as chatbots as well as robots.
Web Developer
They develop websites and web-based apps.
Cybersecurity Expert
They guard against hackers.
Game Developer
They create and design games.
The demand for these jobs is growing quickly in India.
🎯 Benefits of Python Classes for Students
Participating in Python classes has many advantages:
It is easy to get started in programming
Career opportunities that are better
Enhances thinking abilities
Increases confidence
Preparing for jobs to come.
🏫 Why Choose Techradiance for Python Classes?
If you’re looking for the most reputable school, Techradiance offers top-quality Python courses for learners.
They can provide:
Simple and simple teaching
Practical learning
Real-world projects
Supportive environment
This can help students learn quicker and more effectively.
📈 Future Scope of Python in India
Python is growing extremely fast in India.
It is utilised in:
IT companies
Startups
Banks
Healthcare
That means that students who master Python today will have excellent opportunities in the coming days.
🧠 Final Thoughts:
Learning Python is among the most beneficial choices for students of today. When they join Python Classes, students will be able to build solid skills and discover a variety of opportunities for career advancement.
Python is simple, efficient, and powerful. With the proper guidance from institutions such as Techradiance, students can attain amazing success in the coming years.
Learn today and start building your future in technology.
⭐ What Students Say About Techradiance (Testimonials)
💬 Riya Sharma (Class 8 Student)
“I signed up for Python Classes in Techradiance, and it was extremely simple to comprehend. The instructors gave me the steps step-by-step. I even completed my very first computer project. Now I enjoy coding!”
💬 Aarav Verma (Class 10 Student)
“I was looking for Python classes in my area and came across Techradiance. It was the best choice. The courses are simple and useful. I was able to master Python quicker than I had anticipated.”
💬 Priya Singh (Parent)
“My child is now taking python coding classes near me on Techradiance. I’m able to see an enormous improvement in his reasoning and self-confidence. The method of teaching is extremely accommodating to students.”
🚀 📞 Call-To-Action (CTA Section)
Start your Coding Journey by registering with Techradiance now!
Are you eager to start building your career in the field of technology? Join one of the best Python classes at Techradiance to begin learning straightforwardly and enjoyably.
You may be looking for:
Python classes near me
Python coding classes near me
Python programs near me
Techradiance is the right spot for you.
What You Will Get:
Teaching for beginners is easy.
Live-action projects
Expert trainers
Complete Python course
Certificate after completion
Don’t wait! Get started today and learn how to learn Python easily with the help of an expert.
Python is a complete Python course that covers the basics, projects, and real-world applications. For those new to Python, enrolling in structured classes that include practical training is the best choice.
❓ Can I learn Python in 2 hours?
It is not possible to completely master Python in just two hours. You may be able to grasp the basics; however, to understand them properly, it is necessary to practise regularly and receive support from Python classes.
❓ How much does a Python class cost?
The price of Python classes in India typically is between Rs3,000 and Rs25,000, based on the level of the course as well as the duration and institution.
❓ Will AI replace Python coders?
No, AI will not replace Python coders. Instead, it can help developers work faster. Professionals who are proficient in Python will remain highly sought-after.