Today, the world of schools is evolving rapidly. Learning isn’t limited to blackboards and books. Schools are now employing AI Labs and Robotics Labs to assist students in learning in a more effective and practical manner.
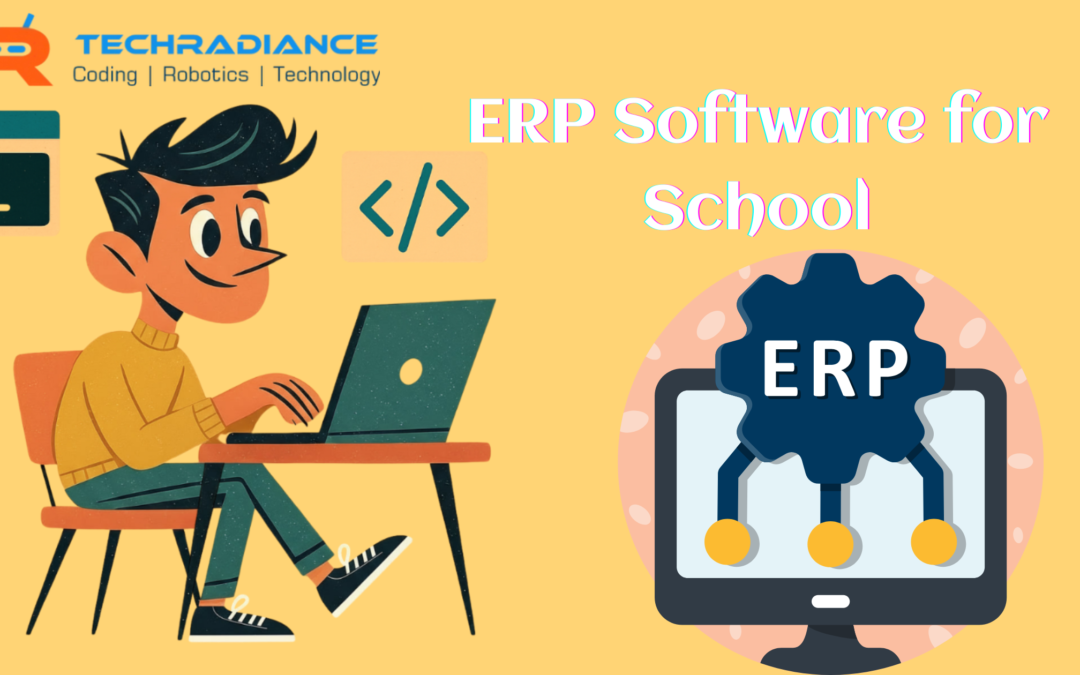
To handle all modern technology efficiently, schools require a sophisticated digital system. This is the place where the ERP Software for schools is a crucial function.
In this blog, we’ll describe the basics of what ERP software does, the reasons it’s important, and how it can help AI laboratories and robot labs. We will explain the setup process in simple and easy terms. This guide has been designed to assist teachers, students, and school administrators in understanding the basics of everything.
ERP Software For schools is a computer-based system that aids schools in managing all their work tasks all from one place.
ERP software links different school activities like:
Student records
Information for teachers
Class schedules
Lab management
Fees and attendance
Instead of working with pencil and paper, schools could make use of ERP software to complete everything online, efficiently and securely.
The school administration is easy and well-organised.
ERP Software Full Form Explained Simply
It is ERP Software the full version that ERP uses is Enterprise Resource Planning.
This is a reference to:
Enterprise school or an institution
Resource: Students, teachers, labs, money
Planning: Managing everything effectively
Therefore, ERP software helps schools organise and manage their resources in an efficient method.
Why ERP Software Is Important for Modern Schools
Modern schools employ modern learning tools such as AI laboratories as well as robotics laboratories. Without a well-organized system in place, the management of these labs could be complicated.
ERP software is essential due to:
It reduces the time spent
It also reduces the need for paperwork.
It enhances the quality of learning
It protects data
It is a modern educational system that supports it.
This means that ERP software essential for schools that are ready for the future.
How ERP Software for Schools Supports AI Labs
AI Labs help students learn about artificial intelligence, intelligent machines, and the future of technology. ERP software assists in managing AI labs in a variety of easy ways.
How ERP Aids AI Labs:
Keeps track of lab times
Students are granted access to AI labs
Learning progress is stored in memory
Monitors hardware and software usage
Aids teachers in planning AI lessons
By using ERP software schools are able to manage AI labs without a hitch.
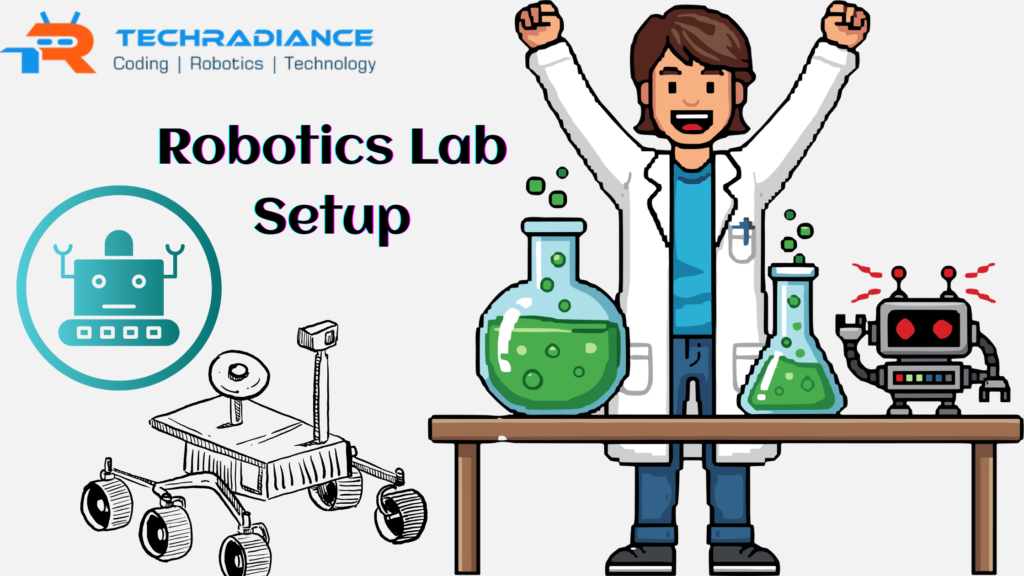
Role of ERP Software in Robotics Lab Setup
A Robotics Lab Setuprequires careful planning as well as scheduling and maintenance. ERP software can help schools manage all of these tasks with ease.
How ERP supports Robotics Labs:
Maintains robotics equipment details
Lab sessions are scheduled for classes.
Tracks student participation
Helps in the management of inventory
Helps teachers plan their lessons
This makes sure that robot labs are utilised correctly and in a safe manner.
How ERP Software Solutions Improve Learning Experience
ERP software solutions have been designed in order to enhance learning and teaching.
For students:
It is easy to access lab schedules and lab hours.
Greater understanding and comprehension through organized learning
More time to practice learning
For teachers:
Simple lesson planning
Easy student performance tracking
Better lab management
For schools:
Centralized control
Better decision making
Better academic performance
Why Schools with AI Labs Need ERP Software
AI labs create a huge amount of data, including:
Student projects
Attendance
Performance reports
ERP software allows you to organize and store this information in a secure manner. This aids schools in understanding student performance and enhancing learning techniques.
If you don’t have ERP software, managing AI lab data can be complicated and lengthy.
Key Components of ERP Software for Schools
ERP software includes a variety of important elements that aid schools in working effortlessly.
Important Components Include:
Information for students
System of teacher management
Management of timetables and attendance
Management of resources and labs
Finance and fee management
Analytics and reports
All of these components function to form one unit.
Benefits of ERP Software for Schools Using Robotics and AI
There are numerous benefits to the use of ERP Software for Schools as well as AI and robotics in education.
Major Benefits:
Better lab planning
Reduction of manual work
Increased engagement of students
The labs can be easily monitored
Faster decision-making
Helps ensure that future-ready education is available
This makes learning more enjoyable and efficient for students.
How ERP Software Helps Teachers in AI and Robotics Labs
Teachers play a crucial part when it comes to AI or robotics in education. ERP software can make their job more efficient.
ERP aids teachers through:
Managing class schedules
Tracking student progress
Planning lab activities
Reduced paper
Teachers can focus more on teaching and coaching students.
How ERP Software Helps Students Learn Better
Students learn best when they have systems that are simple and well-organized.
ERP software assists students by:
Providing clear lab schedules
Access to learning resources
Monitoring progress step-by-step
Promoting practical learning
This makes learning enjoyable and relaxing.
Why ERP Software Is the Future of School Education
Education is going to be digital in the near future. Schools that utilise AI robotics and labs require intelligent systems to run the machines.
ERP software:
Supports digital classrooms
Helps schools grow
Helps students prepare for careers in the future.
Enhances the overall performance of schools
That’s the reason ERP software has become the foundation of the current education system.
How Techradiance Supports Schools with ERP and Advanced Labs
Techradiance helps schools to adopt smart educational systems through providing the most advanced ERP software solutions as well as assistance for artificial intelligence labs, along with robotics labs.
Techradiance is focused on:
ERP systems that are easy to use and simple to use
Learning tools for students that are student-friendly.
Training and support for teachers
Future-ready schooling solutions
Through Techradiance, schools can confidently transition to modern education.
⭐ Testimonials from Schools Using ERP Software by Techradiance
Smooth School Management with Smart ERP
Principal, CBSE School – India
“Techradiance’s ERP Software for Schools made our day-to-day work simple. Managing teachers, students, AI labs, and robotics labs has become simple and efficient. The school has become more organised than ever before.”
The perfect support for AI Labs and Robotics Education
Robotics Teacher
“Earlier, it was the case that managing the robotics lab was not easy. Now, with ERP Software from Techradiance Lab, schedules, lab schedules, and equipment tracking are all efficiently controlled. Teaching has become less stressful.”
An easy learning experience for students
School Administrator
“The ERP software helps students understand their lab times and their activities clearly. Robotics labs and AI sessions are smooth. The students enjoy learning, and the teachers are able to save a lot of time.”
The Future-Ready Option for Modern Schools
School Director
“Techradiance offered us the complete ERP software that can be used to support AI labs and robotics setups. It’s simple to use and is ideal to help schools prepare pupils for the opportunities of tomorrow.”
Final Thoughts:
Modern education needs modern systems. ERP Software for Schools is a crucial part of assisting artificial intelligence labs and robots in education. It helps schools manage their entire curriculum quickly, enhances learning quality, and prepares students for their future.
With the right ERP programme and the expert assistance provided by Techradiance, schools can build an efficient, organised, and modern learning environment for each student.
Frequently Asked Questions:
Q.What is ERP software for school?
ERP software for schools is a system of digital technology that assists in managing teachers, students, classes, fees, attendance, and labs, such as AI and robotics, all from the same platform.
Q. How to use ERP in school?
ERP is used at schools by connecting to the system to control the school’s attendance, schedules, tests fees, lab activities straightforwardly and efficiently.
Q. What ERP features are best for schools?
The top ERP school features are student management monitoring, attendance tracking, timetable scheduling and fee administration, management of labs and even reports.
Q. What are the four types of ERP?
The four kinds of ERP include cloud-based ERP, hybrid ERP and particular industry-specific ERP.
Q. What is the cost of ERP for a school?
The price of ERP for schools is based on the number of students enrolled, the features required, and personalisation. Typically, it starts with an affordable annual plan.
The world of education is rapidly changing. Students today do not learn solely from books. They learn through making experiments, testing, and building. This is why STEM Labs in schools play a significant role.
STEM labs aid students in understanding engineering, science, technology, and math in an engaging and fun way. Instead of just reading the textbook, students can touch, see, and even create objects. This makes learning simple, engaging, thrilling, and memorable.
In this complete guide written by Techradiance, we’ll go over everything you need to know about STEM labs in easy and simple language.
STEM Labs in Schools are learning spaces in which students are taught through tasks related to engineering, science, technology, and maths.
The labs are where students
Perform experiments
Create small-scale projects
Learn about robotics and coding.
Solutions to real-life issues
A STEM lab isn’t only an educational space. It’s an interactive, thought-provoking space that allows students to ask questions, explore new concepts, and learn from their mistakes.
STEM Lab Meaning Explained Simply
The STEM lab meaning is quite simple.
A STEM laboratory is an area in which:
Science is taught through tests
The technology is taught through tools and computers
Engineering is taught through building models
Mathematical concepts are learned by solving problems
Instead of memorising the answers, students grasp concepts on the spot. This makes it easier for them to remember their lessons for a long period of time.
STEM Lab Full Form
Many people enquire regarding the STEM lab full form.
STEM stands for:
S – Science
T – Technology
E – Engineering
M – Mathematics
STEM labs integrate four disciplines into oneexperience of learning, which makes education more efficient and more effective.
Why Are STEM Labs in Schools Important?
STEM labs are essential, as the world needs problem solvers, innovative thinkers, and innovators.
Here’s why schools should have STEM labs:
Students learn through doing, not just by listening.
Children develop curiosity and a sense of wonder.
Learning becomes enjoyable and interactive.
Students acquire skills that will be useful for jobs in the future.
Through the STEM Labs in Schools, students develop into competent learners who are happy with their education.
How Do STEM Labs Work in Schools?
STEM Labs are places for interactive learning and also directed instruction.
Here’s how an STEM lab session is conducted:
The teacher provides a fundamental idea
Students participate in an activity, or conduct an experiment
Students are on teams
They examine the results and then discuss
The teacher aids students to understand the learning process.
This makes learning simple and practical. This also makes learning enjoyable.
STEM Labs for Different Age Groups
STEM labs are beneficial for all levels of school.
Elementary School Students
Simple experiments
Fun science-based activities for kids
Building blocks for basic construction
Middle School Students
Coding fundamentals
Science-related projects
Logical thinking exercises
Senior School Students
Experiments that are advanced
Engineering models
Automation and robotics
This is what makes the STEM labs valuable from early education through higher levels of education.
Robotics Lab in School: Learning the Future Today
A Robotics Lab in Schools is a crucial component of the modern STEM education.
In a lab for robotics students are taught:
How do robots function
Basic programming and coding
How do you build and control machines?
Robotics helps students learn about the technology and automation which are essential in the future of careers.
How Robotics Labs Help Students
A robotics lab helps students:
Develop your logical thinking
Develop problem-solving abilities
As a team, work together
Develop confidence
Through the Robotics lab in School students gain firsthand exposure to new technology.
STEM Labs and Coding Skills
Coding is a vital part of STEM learning.
The STEM Labs are where students
Learn programming basics
Know the logic behind sequences and logic
Make simple games and apps
The process of coding in STEM labs is taught in an easy and fun way, even for younger students.
Students who are learning in STEM labs demonstrate:
More academically successful
A higher level of curiosity in maths and science
Better thinking capabilities
Practical learning helps students comprehend the subject deeply, instead of merely simply memorising the answers.
STEM Labs and Real-Life Learning
STEM labs integrate learning into the real world.
Students are taught:
How machines function
Technology can solve issues
What is the use of math in everyday life?
This helps make education valuable and meaningful.
Future of STEM Labs in Schools
The future for the educational system depends on the development of new skills and innovations.
This is why the STEM Labs are designed to:
Make it part of the school curriculum
Students are able to prepare to work in the global marketplace
Help by using AI as well as digital education
Schools with no STEM labs might get behind in the current education system.
⭐ Testimonials – What Schools & Educators Say
Testimonial 1
“After the establishment of STEM Labs in schools with Techradiance, our students have become more interested and confident. Learning has become practical and enjoyable.” — School Principal, CBSE School
Testimonial 2
“Techradiance has made STEM learning a breeze for both our students and teachers. Even toddlers can comprehend concepts with ease through hands-on activities.” — Academic Coordinator
Testimonial 3
“Our robotics lab in the school has revolutionised the way students learn about technology. Coding and robotics have become their most favoured topics.” -STEM Lab In-Charge, STEM Lab Director
Testimonial 4
“We searched for a top-quality STEM lab, and Techradiance provided exactly what we required. Excellent support and training, as well as teaching instruments.” -” School management team
Final Thoughts: Why STEM Labs in Schools Are a Must
STEM Labs in Schools have become an option. They are a must for modern-day education.
They assist students:
Learn more
Think more strategically
Plan for the future
With the help of Techradiance, schools can develop effective learning environments that make competent and skilled students.
Making an investment in STEM labs now is creating a brighter future for tomorrow’s students.
Frequently Asked Questions ( FAQ’S)
1. What is STEM education?
STEM education is a teaching method that teaches science, engineering, technology and mathematics using hands-on, practical activities.
2. What is STEM in school education?
STEM education in schools helps students understand concepts through experiments, making models and solving real issues in labs and classrooms.
3. What are the 4 main areas of study in STEM?
The four primary areas of STEM comprise engineering, science, technology and mathematics.
4. What is the cost of a STEM lab setup?
The price of a STEM lab is contingent upon the age of students, the size of the lab equipment, and the learning programmes. Schools can select the most basic or advanced labs according to budget.
5. What skills do students learn in STEM labs?
Students develop problem-solving skills, creative thinking, critical thinking and teamwork, as well as coding and fundamental engineering skills within STEM laboratories.
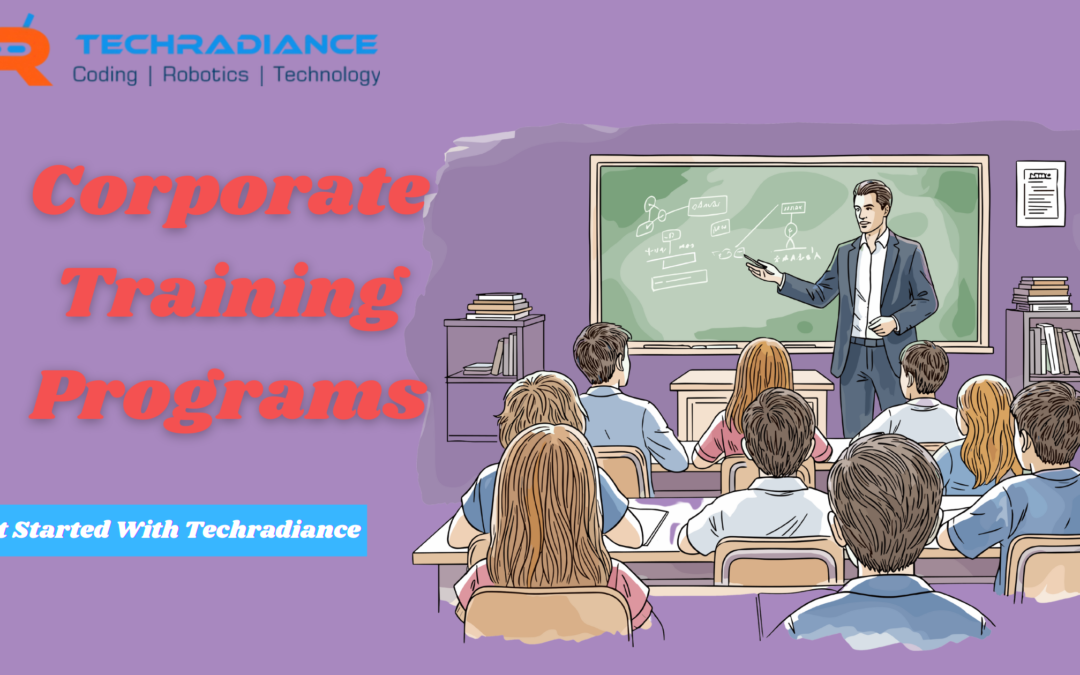
In the current world of rapid change, businesses require knowledgeable and skilled employees to stay ahead. Traditional training methods are no longer enough. This is the reason Corporate Training Programs powered by AI are changing the ways employees learn and develop, as well as perform in their jobs.
The blog’s content is written in simple language, so even a 5th-grade student can understand it.
Corporate Training Programs are educational programs designed specifically for company employees. The programmes aid employees in improving their abilities, knowledge, and performance.
Simply put, corporate training is the process of teaching employees:
How do they perform their work better
How do you use the latest tools and technologies?
How do you communicate and work in a team
How do you become a leader?
If AI (Artificial Intelligence) is added to the training, it is faster, smarter, and more customised.
What Does AI-Powered Corporate Training Mean?
AI-powered training utilizes artificial intelligence to determine how employees learn and imparts knowledge in the most efficient waypossible.
For instance:
AI can recommend courses based on the employee’s ability level
AI can monitor the progress regularly
AI can provide immediate feedback
AI can help you decide the next steps to take in order to improve your knowledge.
This is what makes the Corporate Training Programs designed that are designed for staff more efficient as well as less dull.
Why Corporate Training Programs Are Important for Companies
Corporate training isn’t just about education. It’s about advancing the company.
Here’s why businesses require corporate training:
The employees are trained to become better
The quality of work is improved
Productivity rises
Confidence in employees grows
Companies can save time and money.
With AI, these advantages get even greater because the training is based on data and can be specific.
Why Companies Are Choosing AI-Based Corporate Training Programs
The traditional training method is similar for all. But people learn in different ways. AI solves this issue.
The main reasons why companies choose AI-based learning:
Learners are matched to every employee.
Training is accessible at any time, from anywhere.
The progress is automatically tracked
Learning speeds up and becomes more exciting
This is the reason why a lot of Corporate Training Companies in India are currently providing AI-powered solutions.
How AI Improves Corporate Training Programs
AI makes learning simple and intelligent. Let’s find out how.
1. Personalized Learning
AI recognizes strengths and weaknesses of employees. It then develops a learning pathway that is suited to each individual.
2. Smart Assessments
AI tests the knowledge of employees by taking exercises and quizzes and provides immediate feedback.
3. Real-Time Progress Monitoring
Managers can easily determine the ones who have been learning as well as those that may need assistance.
4. Continuous Improvement
AI continuously improves its training materials in response to employee performance.
How Corporate Training Programs for Employees Work
Here’s a straightforward step-by-step procedure:
Skills Assessment AI checks current skills. AI tests the current level of skills
Learn Plan A custom-designed plan is developed
Learning Delivery videos and quizzes, simulations, and other exercises
Tests and Practice – Employees use what they’ve learned
Feedback & Improvement – AI suggests next steps
This makes learning effortless and easy.
Key Components of AI-Powered Corporate Training Programs
A solid corporate training program comprises the following elements:
Learning Management System (LMS)
A digital platform on which the training materials are stored and accessible.
AI Analytics
Monitors the employee’s learning habits and performs.
Interactive Content
Quizzes, games, videos and games which keep students engaged.
Skills-Based Modules
Training that is focused on actual job skills, not just theoretical.
Certification Programs
Employees receive certificates following completion of the training
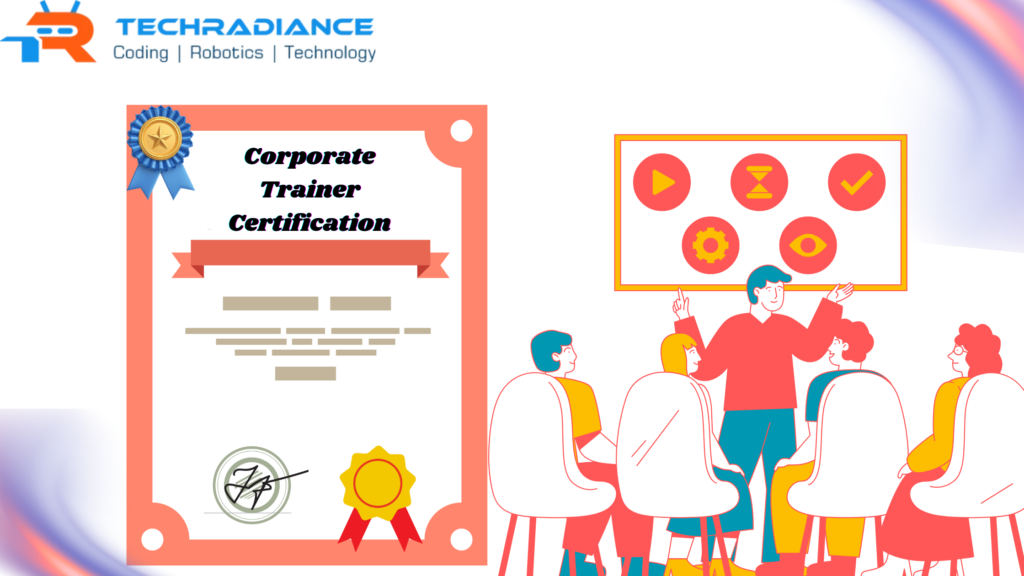
Corporate Trainer Certification: Why It Matters
A Corporate Trainer Certification indicates that the trainer is competent and experienced in teaching professionals.
Benefits of trained trainers certified
Better training quality
Methods for learning in a structured manner
Up-to-date industry information
Trust in companies is higher
AI-powered technology can help teachers enhance their teaching techniques.
Role of Corporate Training Companies
Corporate training companies develop and implement training programmes for businesses.
They can assist in:
Employee skill development
Training for leadership
Technologies and AI training
Communication and soft skills
Today, top corporate training companies in India employ AI to create higher-quality and efficient training programmes.
Why India Is a Hub for Corporate Training Companies
India has a huge and highly skilled workforce. Many companies are investing in education.
Motives: India has the top spot in corporate training
A growing AI and AI industry
Professionally trained trainers and teachers
Cost-effective solutions
A huge demand is for the upskilling of employees.
Companies such as Techradiance play a significant part in this process of transformation.
Benefits of AI-Powered Corporate Training Programs
Let’s take a look at the primary benefits in simple terms.
For employees:
Simple to comprehend learning
They can learn at their own pace
Increased confidence at work
Better career growth
For Companies:
Increased productivity
Performance of employees improved
Costs of training are reduced
Teams with more strength
This is the reason AI powered Corporate Training Programs are now essential.
How Techradiance Delivers Smart Corporate Training
Techradiance offers cutting-edge AI-powered solutions for corporate training that are designed to meet the demands of modern businesses.
What is it that makes Techradiance different?
Customized AI learning pathways
Industry-relevant training content
Professionally certified trainers
Learning platforms that are easy to use
Focus on outcomes
Techradiance helps employees develop abilities that can be useful when they are at work.
Use Cases of Corporate Training Programs
AI-based learning can be utilised in a variety of areas:
Employees are on the way to their new jobs
Leadership development
Training in technical skills
AI as well as data science-based learning
Soft skills and communication
This versatility makes corporate training beneficial in all industries.
Future of Corporate Training Programs
The future of learning is digital, smart, and driven by AI.
What can we expect to see?
A more personalized approach to learning
AI and virtual trainers
Faster skill development
Better job performance
Businesses that invest in AI-powered education today will be the leaders of tomorrow.
Testimonials:
Testimonial 1
“Techradiance has helped our employees become proficient more quickly by utilising AI-based training. The results were astonishing.” HR Manager IT Company
Testimonial 2
“The Corporate training course was easy to comprehend and useful. For beginners, it was easy to learn.” – Trainer Head Manufacturing Company
Testimonial 3
“Our productivity improved following the use of Techradiance’s AI-powered company training solution.” – the CEO of Startup Company. Startup Company
Final Thoughts:
Training for employees is not a luxury. It’s a requirement. The AI-powered Corporate Training Programs aim to make learning easy, efficient, productive, and future-proof. They aid employees in growing and helping companies grow.
If your business is looking for knowledgeable, confident, and efficient employees, AI-based corporate education is the best option. Techradiance will be there to assist you in every step of the process.
Frequently Asked Questions(FAQ’S):
1. What is the meaning of corporate training?
Corporate training is the process of giving employees the skills and information they require to perform their jobs more effectively. It can improve the efficiency, productivity, and growth in the professional world of the company.
2. What is an example of Corporate Training?
One example of corporate education is an AI-powered leadership course that teaches employees about decisions, communication, and solving skills via online courses as well as real-life simulations.
3. What is a Corporate Trainer salary in India?
A corporate trainer salary in India usually ranges from ₹4 lakh to ₹12 lakh per year, depending on experience, industry, and specialization such as AI or digital skills training.
4. What are the types of corporate training?
The most common types of corporate training include onboarding, technical skills training, leadership and soft skills training. compliance training and AI-powered corporate education programs
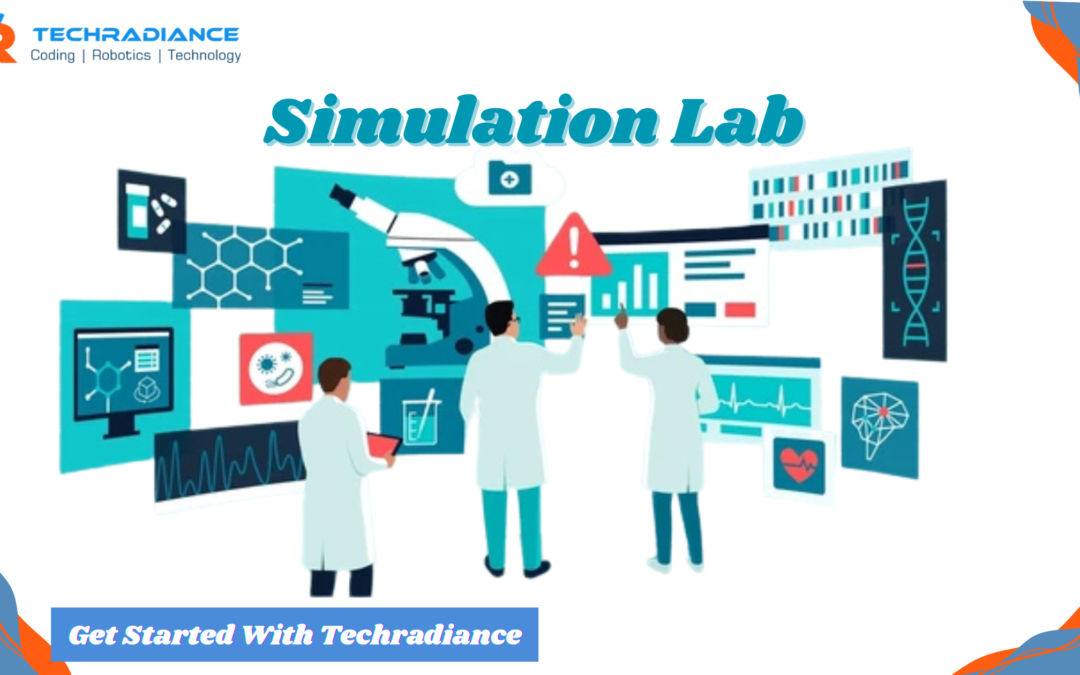
The world of education is rapidly changing. Today, students learn best when they experience, experiment, and experiment with things rather than just reading books. This is why the Simulation Lab is essential for colleges and schools. A simulation lab can help students grasp complex concepts in an easy and effective way by using digital tools.
In this blog, we’ll describe the basics of what a simulation lab is, the reason it is essential, and how to set it up, as well as its advantages and its key elements. The text is written in a simple language that even the 5th-grade students can understand easily.
Simulation Labs Simulation lab is a cutting-edge learning centre where students are taught by engaging in computer-generated simulations rather than traditional tests. Students can participate in virtual experiments, see the results, and comprehend concepts with no risk.
Simply put, it can be described as a digital classroom in which real-life scenarios are demonstrated by using technology. Students are able to practise repeatedly until they are able to fully grasp the subject.
Simulation Lab Meaning
The Simulation Lab Meaning is simple to comprehend. It means an area in which real-life experiments are displayed digitally with computers, software and screens.
For instance:
A science experiment on an electronic computer
A motion experiment in physics that is performed in virtual reality
A chemical reaction is explained in an animation
This helps make learning secure, engaging and enjoyable.
Why Simulation Labs Are Important for Schools and Colleges
Traditional labs are essential; however, they do face some challenges, such as security risks and expensive and limited equipment. A simulation lab can solve a lot of these issues.
The main reasons why simulation labs are required:
Students learn faster about topics.
Chemicals are safe and there is no risk from machines
It is possible to repeat experiments numerous times
Teachers can clearly explain concepts to students.
Learning is fun and interesting.
In a lab that simulates, students don’t simply memorise information; they know and apply the skills learned
What Is Virtual Lab Simulation?
A Virtual Lab Simulation is the process of conducting lab experiments with an electronic or computer system instead of actual equipment. Students are able to click, look or interact with the simulations as they would in a real lab.
These simulations assist students:
Visualize concepts from science
Learn the steps in a step-by-step process
Experiment with your experiments any time, anywhere
Virtual labs are particularly useful when physical labs aren’t readily available or the resources are not sufficient.
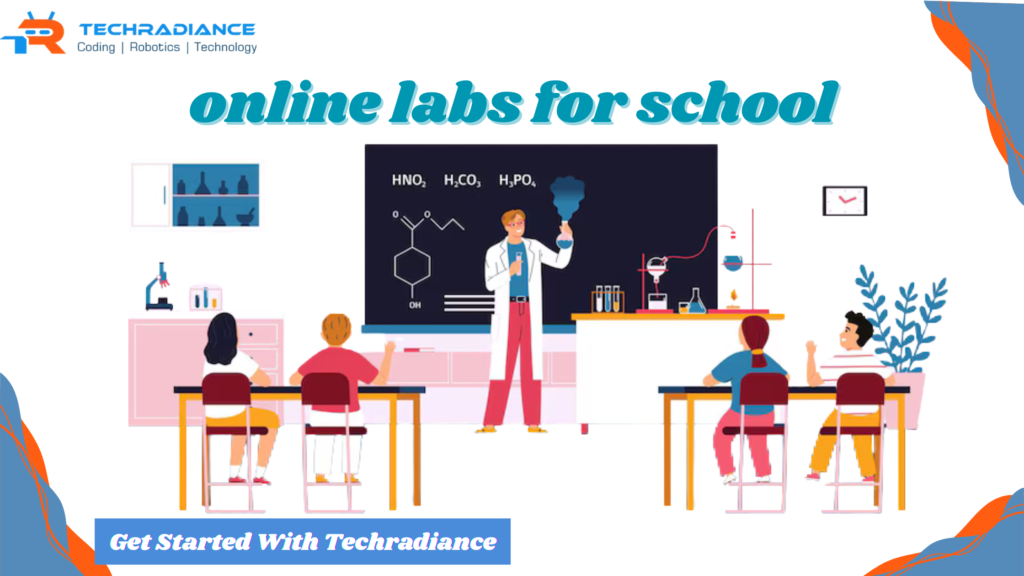
Online Labs for School: A Smart Learning Solution
Online labs for schools are gaining popularity. They allow students to explore their experiments on the internet and even at home.
What are the reasons? Online Labs Are Helpful:
Learning continues outside classrooms
Great for revision and homework
It is helpful during hybrid or online classes.
It is easy to access remote and rural schools
Through online labs, you can never stop learning.
Science Simulation: Making Learning Easy and Fun
Science simulation helps students understand complex science concepts using animations and models along with interactive software. Concepts such as electricity, gravity, chemical reactions, and biological processes are made easy to grasp.
Instead of just studying the theory, students could:
Watch how things go
Know the relationship between cause and effect and
Learning by experience, not by memorising
This stimulates curiosity and builds confidence in science.
How to Set Up a Simulation Lab (Step-by-Step Guide)
Step 1: Determine the Learning Objectives
First, determine what topics the simulation lab will accommodate For example:
Physics
Chemistry
Biology
Mathematics
Engineering basics
This will help you choose the appropriate tools and software.
Step 2. Infrastructure and Space
A simulation lab doesn’t require a large space. A quiet and clean room equipped with:
Proper lighting
Good air circulation
A comfortable seating
is sufficient to set the lab.
Step 3. Hardware Requirements
The basic hardware required includes:
Laptops or computers
Smart board or projector
Headphones (optional)
A reliable internet connection
These tools allow students to interact using simulations with ease.
Step 4: The Simulation Software as well as the Content
Choose a suitable age and curriculum-based simulation software. The best software will:
Make it easy to utilize
College or Match School syllabus
Facilitate Interactive Learning
This is at the heart of a simulation lab.
Step 5: Teacher Training
Teachers should be trained in:
Make use of simulation tools with confidence
Explain concepts using digital content
Help students through virtual labs
The lab is made more efficient by teachers who have been trained. more efficient.
Step 6: Updates on a regular basis and Support
Technology is constantly evolving. regular updates and support for technical issues ensure that the lab remains efficient and functional for a long period of time.
Key Components of a Simulation Lab
1. Digital Devices
Tablets, computers or smart screens are utilized for simulations.
2. Simulation Software
Interactive programs that showcase the results of experiments as well as real-life scenarios.
3. Internet Connectivity
It is required in online laboratories, upgrades as well as cloud-based simulations.
4. Learning Content
Lessons, activities and tests.
5. Teacher Control Panel for Teacher Control
Aids teachers monitor student progress and help guide students’ their learning.
Benefits of Simulation Lab for Students
Better Understanding
Students learn through visuals and this helps them comprehend concepts in a clear way.
Safe Learning Environment
There is no risk of chemical or physical accidents or equipment loss.
Repeat the Practice
Students may repeat their the experiments as many times as required.
Increased Interest
Interactive and vibrant images allow students to learn in a fun and engaging way.
Confidence Building
Students feel secure that they have a solid understanding of concepts.
Benefits of Simulation Lab for Teachers
Easy explanation of difficult subjects
Better classroom engagement
It saves time and energy.
Helps track student progress
Helps to implement smart teaching techniques
Benefits for Schools and Colleges
Cost-effective when compared with physical labs
Modern and modern learning environment
Improves reputation of the institution
attracts students and parents.
Supports NEP and its digital education goals
Why Choose Techradiance for Simulation Lab Setup?
Techradiance is a well-known brand for educational technology solutions. We are experts in the design and establishing simulation labs for colleges and schools.
Techradiance’s Offers:
Solutions for customizing simulation labs
Content aligned with the curriculum
Simple-to-use software
Support for teacher training and education
End-to-end lab set-up
Our mission is to make learning easy, efficient and future-ready.
Simulation Lab for the Future of Education
Simulation labs aren’t only a fashion, they will be the norm in educational. As technology advances and students learn, they must use advanced tools. Simulation labs prepare students for:
Higher education
Competitive exams
Real-world problem solution
Careers that are based on technology
What Schools & Colleges Say About Our Simulation Lab
Testimonial 1 – School Principal
“After creating our simulation Lab with the help of Techradiance, our students’ comprehension of concepts in science has increased dramatically. Even the most difficult topics are simple to explain and understand. It has revolutionised our method of teaching.”
Testimonial 2 – Science Teacher
“The Simulation lab can be simple to use. Visual activities help students comprehend more quickly and keep them more active in the classroom. Techradiance also offered excellent training and assistance.”
Testimonial 3 – College Administrator
“We needed a secure and cost-effective lab, so our Simulation Lab was the perfect option. Students can try out numerous times with no risk. Techradiance did exactly what they said they would.”
Testimonial 4 – Parent Feedback
“My child now loves studying science. The experiments in virtual form provide clear and engaging concepts. I’m seeing a significant increase in my confidence and interest. Thank you Techradiance for bringing intelligent education to schools.”
Final Thoughts
The Simulator Labis a potent learning tool that can transform traditional learning into an interactive and enjoyable experience. From virtual lab simulations to online labs available for school and the science simulation to digital labs, simulation labs facilitate learning efficiently, safely, and securely.
With the right tools, planning and assistance, with the help of Techradiance schools and colleges can create a thriving learning environment that will benefit students as well as teachers and even institutions.
Frequently Asked Questions
1. What is a Simulation Lab?
The Simulation Lab is a digital learning environment where students can grasp concepts by using virtual experiments with interactive simulators.
2. What is the purpose of using simulation?
The Simulation Lab is a digital learning environment where students can grasp concepts by using virtual experiments with interactive simulators.
3. Are online labs for school useful?
Yes online labs at schools are extremely beneficial because students can learn and do exercises at any time, from anywhere.
4. What subjects can use science simulation?
Science simulation can be utilized in chemistry, physics, math, biology as well as in basic engineering subjects.
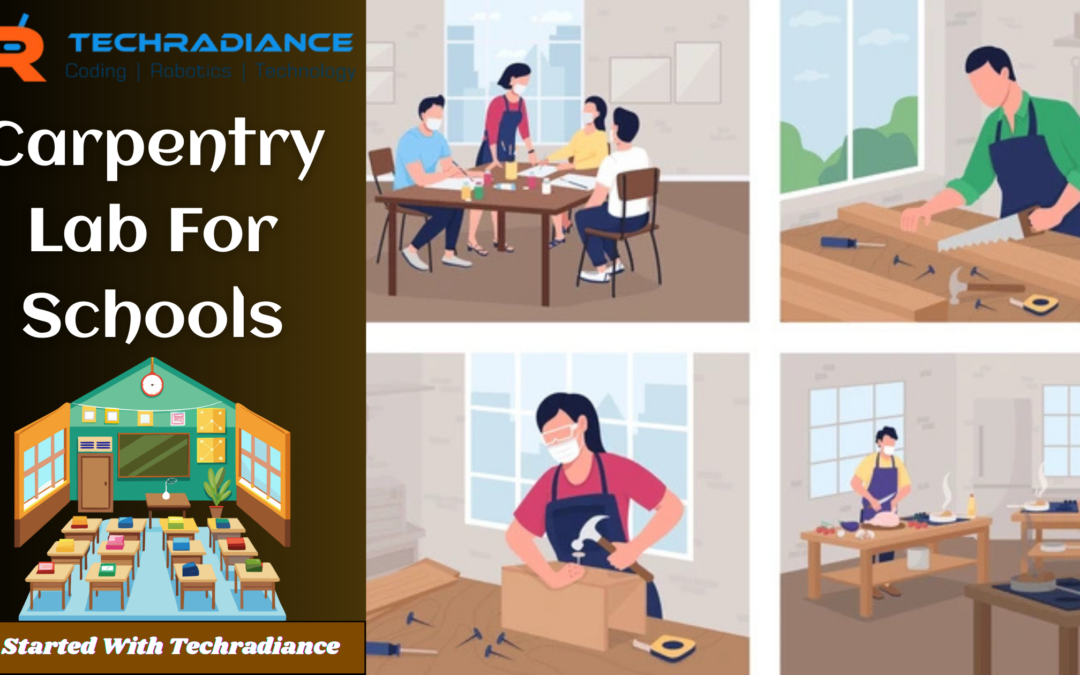
In the modern educational system, hands-on learning is as crucial as reading. One of the most effective methods to teach students how to work hands-on is to create the Carpentry Lab in schools. A well-planned carpentry laboratory helps students discover how things are made, increases the ability to think creatively, and develops the skills to solve problems at an early age.
In this tutorial from Techradiance We will discuss the basics of what a carpentry laboratory is, the reason schools should have it, and how to create it step-by-step, and the most important components, its benefits, along with tools–all in an easy-to-understand language that even a 5th-grade student will be able to comprehend the concept.
The Carpentry Lab is a specific room at the school where students learn how to use wood. In this laboratory students work with simple tools to cut and shape, join and then finish wood pieces.
It’s also known as it a Woodworking Lab since students are taught basic woodworking skills such as:
Wood measurements
Cutting safely
Making small wooden objects
Understanding how tools function
This lab is geared towards the process of learning through doing, and not only by reading.
Why Do Schools Need a Carpentry Lab?
The carpentry lab in schools is needed for teaching the practical skills, creativity and self-confidence to students.
A Comprehensive Explanation
This is why each modern high school must have a workshop for carpentry:
Students are taught practical abilities
Improves hand-eye coordination
Inspires creativity
Helps students comprehend the structure and design
Encourages students to be interested in technical and vocational education.
The carpentry workshop helps students learn in a fun and meaningful way.
Benefits of a Carpentry Lab for Students
1. Learning through Doing
Students are more able to grasp concepts when they build things themselves.
2. Enhances Creativity
Children can design and build models made of wood, toy or even furniture.
3. Increases confidence
When students complete their project, they are happy and confident.
4. Career Awareness
Students learn early about techniques used in design, engineering or skilled professions.
5. Discipline and Teamwork
In a lab, you can learn safety, teamwork and also discipline.
Key Components of a Carpentry Lab
In order to set up a good Carpentry lab , schools must include the following elements:
1. Lab Space
A neat, well-ventilated, and clean room
Space for students to be able to move in a safe manner
Solid flooring for heavy-duty equipment and workbenches
2. Workbenches
Metal or wood benches made of solid wood
Proper height for students
Space to secure wood pieces
3. Safety Equipment
Safety goggles
Hand-gloves
Aprons
First aid kit Safety is the most critical aspect of any carpentry laboratory.
4. Storage Area
Racks for wood
Tool cabinets
Locked storage compartment for sharp tools
Carpentry Lab Setup: Step-by-Step Guide
Step 1: Organizing the Lab
Before beginning with the carpentry lab schools must plan:
The number of students
The age group (primary and secondary)
Budget
Space available
A good plan can prevent future issues.
Step 2: Selecting the right location
Ground floor is the most ideal
Airflow and proper lighting
Get away from the classrooms to lessen the amount of noise
A safe and secure location will keep students safe and secure.
Step 3: Creating the Layout
Separate areas to be used for cutting, assembling and completing
Walking paths that are clear
Tools that are readily accessible
A neat layout enhances the learning process and increases safety.
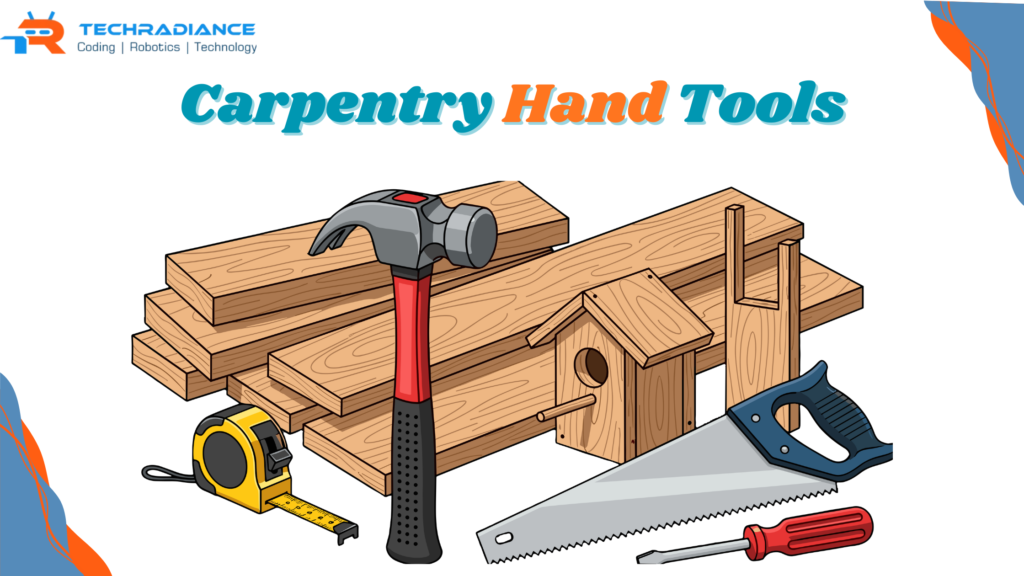
Step 4: Selecting the Carpentry Tools List
Making the right choice of tools is a crucial step. Schools should begin with the basics tools that can be used by students.
Carpentry Tools List for Schools
Here’s a quick and user-friendly carpentry tool list:
Basic Tools for Measuring
Measuring tape
Steel ruler
Try square
Cutting Tools
Hand saw
Coping was
Shaping Tools
Wood file
Chisel
Tools for Fixing
Hammer
Screwdriver
Finishing Tools
Sandpaper
Wooden block
These tools are simple to use and secure under the supervision of a teacher.
Carpentry Hand Tools: What Students Use First
Carpentry hand tools are tools that operate without electricity. They are ideal for schools due to their safety and are less difficult to manage.
Examples include:
Hammer for fixing nails
Chisel to shape wood
Hand saw to cut
File to smooth edges
Students must always master the basics of hand tools prior to moving on to more advanced tools.
Role of a Woodworking Lab in Skill Development
A woodworking lab helps students understand:
What happens when wood is used as raw product?
The importance of precision and patience
Fundamental engineering concepts
It also covers subjects such as:
Science
Mathematics
Design & Technology
Learning becomes more connected and useful.
Safety Rules in a Carpentry Lab (Must Follow)
Safety rules must be explained clearly to each student:
Always wear safety glasses
Make use of tools only with permission from the teacher
Keep the lab spotless
Do not run in the lab.
Report injuries immediately
Safety education is just as vital as skill training.
How Techradiance Helps Schools Set Up Carpentry Labs
Techradiance is a specialist in the design and establishment of modern labs for schools. Techradiance helps schools by:
The complete carpentry lab is planned
Lab layout design
Tool selection
Safety Standards
Solutions for labs that are student-friendly
Our mission is to make education easy, safe, and efficient.
Who Can Use a Carpentry Lab?
A Carpentry lab is helpful to:
Primary school students
Students from middle and high schools
Education programs based on skills
Vocational instruction courses
It can be adapted depending on the age of the student and the level of learning.
What Schools Say About Techradiance Carpentry Labs
Testimonial 1
“Techradiance assisted us in setting the carpentry lab for our students. Tools are safe, and students enjoy the hands-on approach to learning.” -Principal, CBSE School. Director, CBSE School
Testimonial 2
“The carpentry laboratory developed by Techradiance is straightforward, well-organized, and ideal for students in schools.” -“School Administrator” The School’s Administrator
Testimonial 3
“Our pupils are much more comfortable and imaginative after working in the woodworking lab. Great help provided by Techradiance.” — Science Coordinator
Testimonial 4
“From the planning stage to the execution phase, Techradiance made the carpentry lab set-up simple and secure for our school.” — Academic Director
Final Thoughts
Setting up a carpentry laboratory isn’t just about tools and wood; it’s about creating skills for the future. If students learn using them, they learn better and improve their skills faster.
If your school is looking to provide practical education in a straightforward and secure method, and needs a Carpentry Lab is an ideal way to begin. Techradiance will be there to assist you every step of the way.
Frequently Asked Questions
1. What are 5 carpentry tools?
Five commonly used tools for carpentry include a hammer and handsaw, a chisel, a measuring tape, and screwdriver. These tools can be used to cut, form, and measure, as well as fix the wood.
2. What is the work of carpentry?
Carpentry involves making and fixing wooden pieces like doors, tables, shelves, and smaller models by joining and cutting wood.
3. What is level 4 carpentry?
Carpentry at Level 4 is a higher level of learning in which students tackle larger projects, utilise more tools, and master the design, precision, and safety in great detail.
4. What tools are needed in a school carpentry lab?
A carpentry workshop at school requires basic hand tools like a hammer, handsaw and chisel. Also measurement tapes, screwdrivers Sandpaper, as well as safety gear.
5. What is included in a carpentry lab setup?
A carpentry laboratory setup includes an area for safe practice and workbenches and storage units, hand tools for carpentry safety gear, and wooden tools for practising.
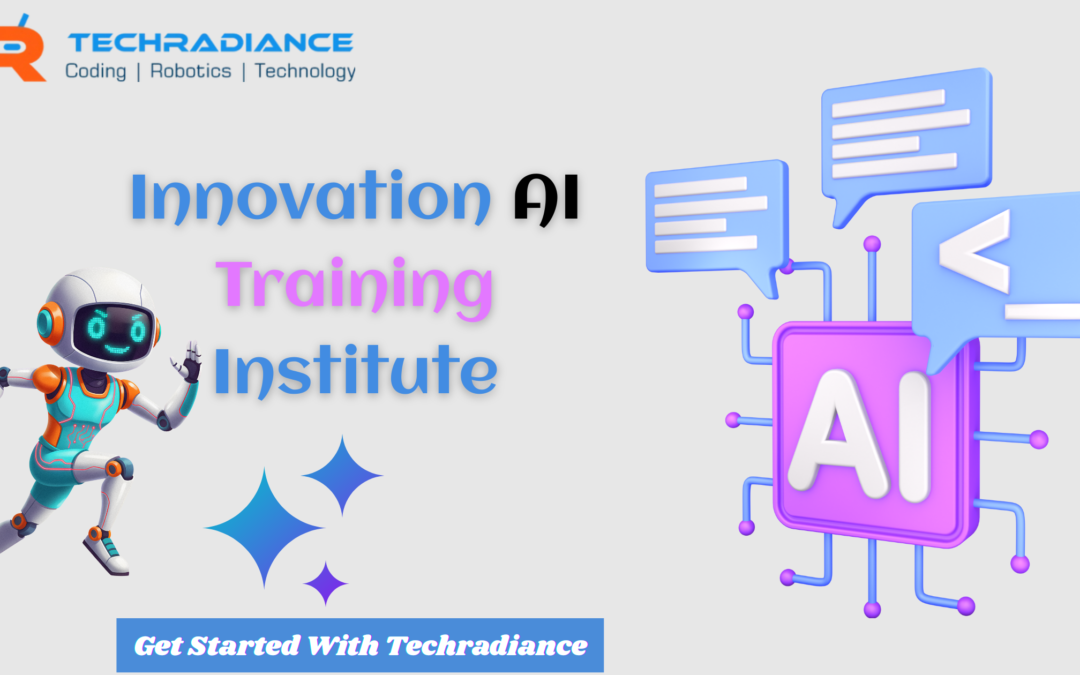
In our fast-changing times, Artificial Intelligence (AI) is becoming an element of our daily lives. From smartphones to smart classrooms, AI is everywhere. Schools and colleges are now encouraging students to be taught about AI early to prepare them for the future. This is the place where the Innovation AI Training Institute plays a vital role.
Techradiance offers an Innovation AI Training Institute that aids educational institutions in bringing AI learning to life in a straightforward, enjoyable, practical, and fun manner. This blog will explain the basics of what an Innovation AI Training Institute is working on, how it functions, the reasons it’s so essential, and what it can do in easy words that a fifth-class student understands.
The Innovation AI Training Institute is a facility which teaches teachers and students how to utilize Artificial Intelligence in the real world. It doesn’t focus solely on the theory. Instead, it helps students to think, create and create with AI tools.
These institutes create special programs specifically for colleges and schools, in order to help students:
Know AI the basics quickly
Learn through activities
Build easy AI projects
Explore your ideas and come up with solutions
In simple terms it’s a centre for learning where AI and innovation meet.
Why Educational Institutions Need AI Training Today
It is extremely changing rapidly. Future jobs will require AI skills. If students begin learning AI earlier, they are more prepared and confident.
Principal Reasons Schools Need AI Training
AI is already being used in everyday life (voice assistants games, apps, etc.)
Future careers will require AI capabilities
AI enhances the ability to think logically
Students develop problem-solving skills
The schools are modern and technologically advanced.
The Innovation AI Training Institute works closely with colleges and schools. Its goal is to make AI learning enjoyable, easy and practical.
Step-by-Step Process
Know the school’s learning levels
Design-friendly and age-friendly AI programs
Teachers and students are trained.
Provide hands-on activities
Encourage schools to participate in projects and ideas
The entire course is explained with simple illustrations, stories and real-world use cases.
What Is an AI Artificial Intelligence Course?
An AI artificial intelligence course shows students how machines learn and think as humans do. It begins with very basic concepts, and then gradually progresses towards practical learning.
What students learn
What exactly is AI in simple terms
How AI assists humans
How machines learn?
How AI is applied in everyday life
Games and activities for small AI
The courses are designed to ensure that even children can comprehend without trepidation or confusion.
What Are AI Machine Learning Courses?
AI machine learning courses teach computers to make sense of information. Instead of establishing the same rules that machines follow, they learn through the use of examples.
Simple example for students
If a computer has to look at a lot of photos with cats in them, it can learn what a cat’s appearance is. Next time, it can determine if a photo is of cats or not.
What students learn
What is machine learning?
Learning by example
Fun projects that combine data with fun
Real-world applications
These classes help students think critically and develop their creativity.
What Are AI Innovation Ideas?
AI Innovation ideas are innovative approaches to solve problems by using AI. They are encouraged by their teachers to be creative and ask questions such as:
Could AI aid in saving water?
Could AI aid in the classroom?
AI can help farmers? Can AI aid farmers?
Can AI help doctors?
Students are taught that AI is more than technology. It is an effective tool that can help people.
How Techradiance Helps Educational Institutions
Techradiance partners in partnership with colleges, schools, and training facilities to help bring AI learning to life in the simplest method that is possible.
Support is provided
Specialized AI software for schools
Workshops for teacher training
Learning modules for students that are user-friendly
Projects and activities that are hands-on
Support for long-term academics
The focus is always on having fun while learning and not under pressure.
Benefits of an Innovation AI Training Institute
1. Easy Learning
AI is taught as a simple language, using everyday examples.
2. Future-Ready Students
Students acquire the skills required for a successful career and future job.
3. Enhances Thinking Skills
AI learning improves logical thinking and creativity as well as solving problems.
4. Encourages Innovation
Students develop innovative ideas instead of remembering.
5. Enhances confidence
Learning through hands-on experiences helps students become comfortable with technology.
Why Techradiance Is a Trusted Innovation AI Training Institute
Techradiance believe that everyone can learn AI regardless of their age. The method of teaching is casual and practical. It is also student-focused.
Key Strengths
Simple teaching techniques
Educationally friendly content
Concentrate on creativity and innovation
The method of practical learning
Education is a priority and teachers are supported with a strong voice.
Educational institutions rely on Techradiance because it makes learning simple, safe and valuable.
How AI Training Helps Teachers
AI training is not just for students. Teachers too benefit from AI training.
Teacher Benefits
Improved understanding of the latest technologies
Simple ways for describing AI concepts
Modern teaching methods for teachers
Confidence in digital classrooms
Teachers serve as guides to assist students in exploring technology with confidence.
Testimonials
Testimonial 1
“Techradiance has made AI learning easy and easy for students. Even the youngest students loved the lessons and learnt in a way that was exciting.”
Testimonial 2
“The AI training program helped our teachers to understand the latest technology with ease. The training material was simple and easy for students to understand.”
Testimonial 3
“Students enjoyed the hands-on learning activities. AI is no longer a challenge following Techradiance education.”
Testimonial 4
“We noticed a significant increase in students’ creativity and confidence after we implemented AI training at our institution.”
Final Thoughts
The idea of an Innovation AI Training Institute is no longer a luxury; it is an essential requirement for schools of higher education. The early start of AI education can help students become more intelligent, creative and prepared for the future.
With easy-to-learn methods that incorporate practical learning and an unwavering support system, Techradiance helps schools and colleges to introduce AI effectively and in the most efficient manner possible. When choosing the best AI training partner, schools can prepare students not only for exams but also for their future jobs.
If you’d like your institution to be a leader in technology and innovation, then launching AI education now is the most effective way to move forward.
Frequently Asked Questions
1. What is Innovation AI?
Innovation AI is the application of Artificial Intelligence to create new concepts, intelligent solutions, and more efficient products by utilising technology and data.
2. What is the best AI training course?
The most effective AI course in training teaches AI basic concepts including machine learning, machine learning, and practical applications in a straightforward and practical manner.
3. Is Google AI course worth it?
Yes, Google AI is a good course. Google AI course is good for beginning students to grasp the basics of AI concepts, but more practical training is necessary to develop advanced skills.
4. How can AI be used for innovation?
AI aids in innovation by analysing data and automating tasks as well as predicting trends and helping solve creative problems.